mNo edit summary Tag: Visual edit |
m (Adding blue pods. Saving progress.) |
||
| Line 8: | Line 8: | ||
There is currently no associated map with The Slimeulation, so locations are indicated by landmarks. |
There is currently no associated map with The Slimeulation, so locations are indicated by landmarks. |
||
| − | |||
| − | ==Green Pods (Treasure Cracker MK I)== |
||
==Blue Pods (Treasure Cracker MK II)== |
==Blue Pods (Treasure Cracker MK II)== |
||
| + | ==='''Portable Water Tap'''=== |
||
| + | {| class="article-table" style="text-align: center; font-size: 90%; line-height: 1em; width: 95%; margin: 1em auto 1em auto;" |
||
| + | |+ |
||
| + | |- |
||
| + | !<center>Notes</center> |
||
| + | !<center>In-game</center> |
||
| + | !<center>Loot</center> |
||
| + | |- |
||
| + | |[[The Indigo Quarry]] zone |
||
| + | |[[File:SlimeulationPod1.png|250px]] |
||
| + | |[[Portable Water Tap]]<br />[[File:PortableWaterTap.png|150px|link=Portable Water Tap]] |
||
| + | |} |
||
| + | |||
| + | ==='''Fruit Slime Bait'''=== |
||
| + | {| class="article-table" style="text-align: center; font-size: 90%; line-height: 1em; width: 95%; margin: 1em auto 1em auto;" |
||
| + | |+ |
||
| + | |- |
||
| + | !<center>Notes</center> |
||
| + | !<center>In-game</center> |
||
| + | !<center>Loot</center> |
||
| + | |- |
||
| + | |[[The Moss Blanket]] zone |
||
| + | |[[File:SlimeulationPod2.png|250px]] |
||
| + | |[[Fruit Slime Bait]]<br />[[File:FruitSlimeBait.png|150px|link=Fruit Slime Bait]] |
||
| + | |} |
||
| + | |||
| + | ==='''Veggie Slime Bait'''=== |
||
| + | {| class="article-table" style="text-align: center; font-size: 90%; line-height: 1em; width: 95%; margin: 1em auto 1em auto;" |
||
| + | |+ |
||
| + | |- |
||
| + | !<center>Notes</center> |
||
| + | !<center>In-game</center> |
||
| + | !<center>Loot</center> |
||
| + | |- |
||
| + | |[[The Moss Blanket]] zone |
||
| + | |[[File:SlimeulationPod3.png|250px]] |
||
| + | |[[Veggie Slime Bait]]<br />[[File:VeggieSlimeBait.png|150px|link=Veggie Slime Bait]] |
||
| + | |} |
||
| + | |||
| + | ==='''Meat Slime Bait'''=== |
||
| + | {| class="article-table" style="text-align: center; font-size: 90%; line-height: 1em; width: 95%; margin: 1em auto 1em auto;" |
||
| + | |+ |
||
| + | |- |
||
| + | !<center>Notes</center> |
||
| + | !<center>In-game</center> |
||
| + | !<center>Loot</center> |
||
| + | |- |
||
| + | |[[The Indigo Quarry]] zone |
||
| + | |[[File:SlimeulationPod4.png|250px]] |
||
| + | |[[Meat Slime Bait]]<br />[[File:MeatSlimeBait.png|150px|link=Meat Slime Bait]] |
||
| + | |} |
||
| + | |||
| + | ==='''Battery Tower'''=== |
||
| + | {| class="article-table" style="text-align: center; font-size: 90%; line-height: 1em; width: 95%; margin: 1em auto 1em auto;" |
||
| + | |+ |
||
| + | |- |
||
| + | !<center>Notes</center> |
||
| + | !<center>In-game</center> |
||
| + | !<center>Loot</center> |
||
| + | |- |
||
| + | |[[The Moss Blanket]] zone |
||
| + | |[[File:SlimeulationPod5.png|250px]] |
||
| + | |[[Battery Tower]]<br />[[File:BatteryTower.png|150px|link=Battery Tower]] |
||
| + | |} |
||
| + | |||
| + | ==='''Field Kit'''=== |
||
| + | {| class="article-table" style="text-align: center; font-size: 90%; line-height: 1em; width: 95%; margin: 1em auto 1em auto;" |
||
| + | |+ |
||
| + | |- |
||
| + | !<center>Notes</center> |
||
| + | !<center>In-game</center> |
||
| + | !<center>Loot</center> |
||
| + | |- |
||
| + | |[[The Moss Blanket]] zone |
||
| + | |[[File:SlimeulationPod6.png|250px]] |
||
| + | |[[Field Kit]]<br />[[File:FieldKit.png|150px|link=Field Kit]] |
||
| + | |} |
||
| + | ==='''Supply Drop'''=== |
||
| + | {| class="article-table" style="text-align: center; font-size: 90%; line-height: 1em; width: 95%; margin: 1em auto 1em auto;" |
||
| + | |+ |
||
| + | |- |
||
| + | !<center>Notes</center> |
||
| + | !<center>In-game</center> |
||
| + | !<center>Loot</center> |
||
| + | |- |
||
| + | |[[The Dry Reef]] zone |
||
| + | |[[File:SlimeulationPod7.png|250px]] |
||
| + | |[[Supply Drop]]<br />[[File:SupplyDrop.png|150px|link=Supply Drop]] |
||
| + | |} |
||
==Purple Pods (Treasure Cracker MK III)== |
==Purple Pods (Treasure Cracker MK III)== |
||
Revision as of 19:33, 19 June 2019
 |

This page lists all of the available Treasure Pods in The Slimeulation.
The Jetpack is necessary to find these Pods, as the terrain requires extensive use of it to navigate. Additionally, the Treasure Cracker Mk II is necessary to open all of them as it is required to enter Viktor's Workshop.
There is currently no associated map with The Slimeulation, so locations are indicated by landmarks.
Blue Pods (Treasure Cracker MK II)
Portable Water Tap
| The Indigo Quarry zone | 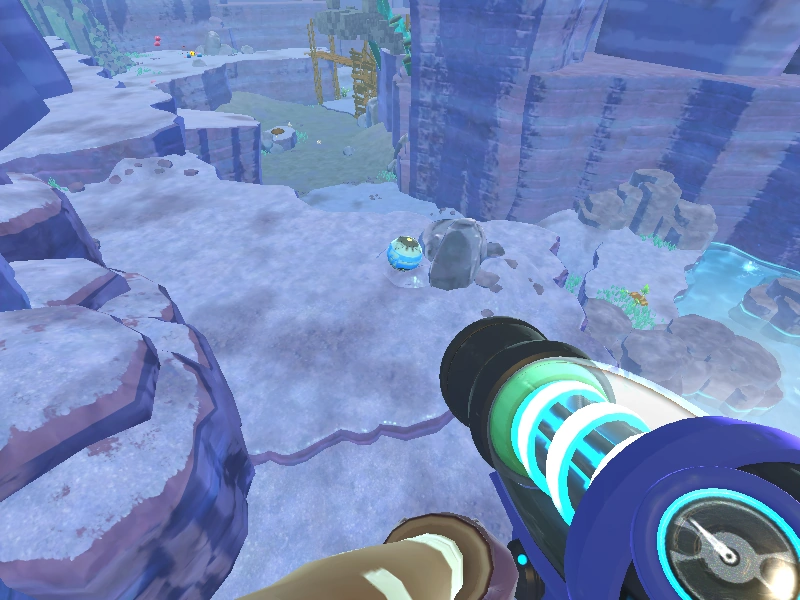
|
Portable Water Tap
|
Fruit Slime Bait
| The Moss Blanket zone | 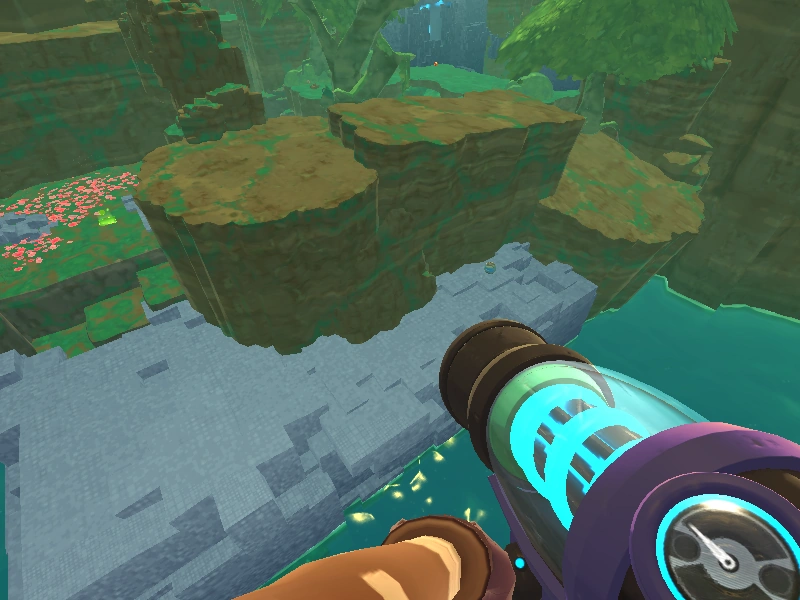
|
Fruit Slime Bait
|
Veggie Slime Bait
| The Moss Blanket zone | 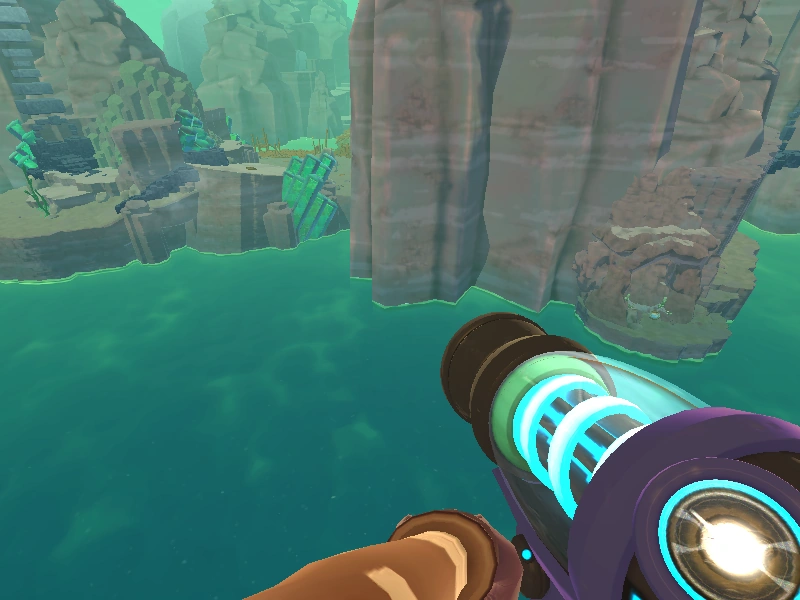
|
Veggie Slime Bait
|
Meat Slime Bait
| The Indigo Quarry zone | 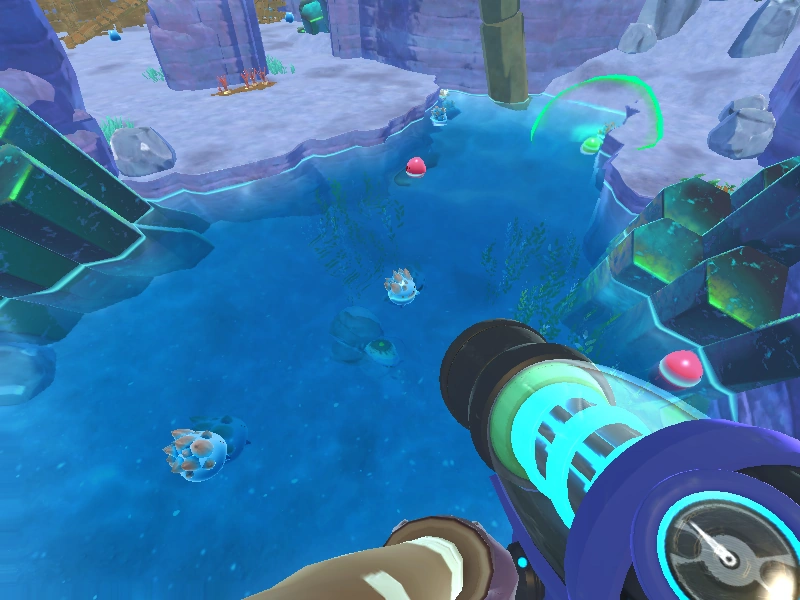
|
Meat Slime Bait
|
Battery Tower
| The Moss Blanket zone | 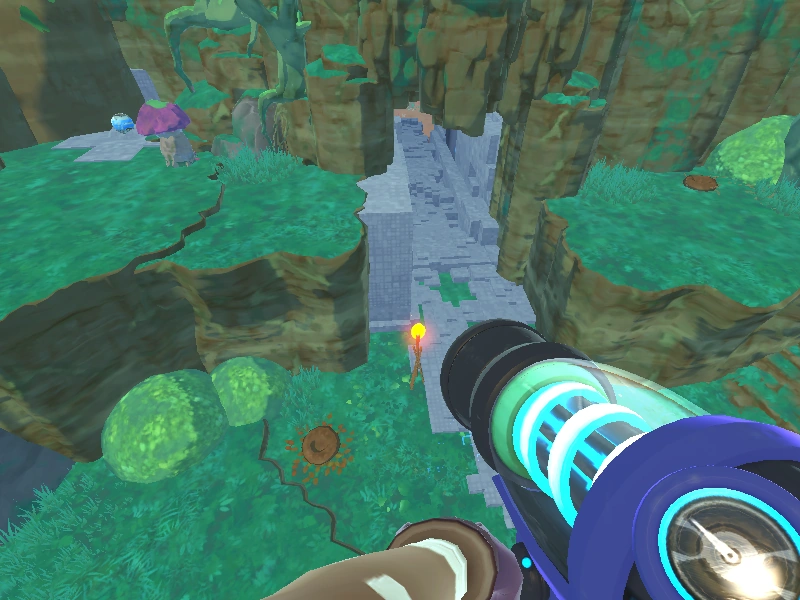
|
Battery Tower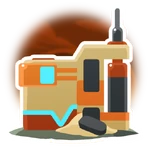
|
Field Kit
| The Moss Blanket zone | 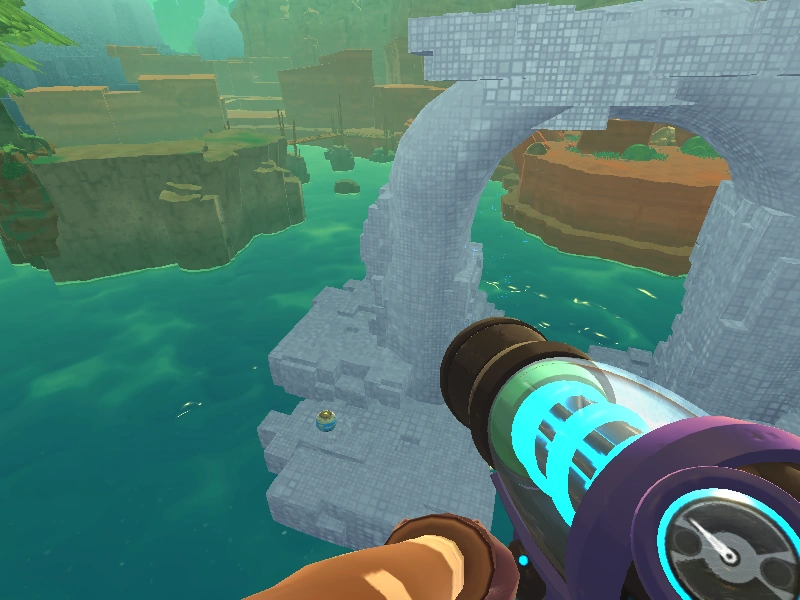
|
Field Kit
|
Supply Drop
| The Dry Reef zone | 
|
Supply Drop
|
Purple Pods (Treasure Cracker MK III)
| Locations | Viktor's Workshop • The Slimeulation |
|---|---|
| Facilities | Decorizer |
| The Slimeulation | Glitch Slime • Debug Spray |
| Slime Science Resources | Manifold Cube |
| Collectables | The Slimeulation Treasure Pods |
| Utilities | Advanced Drone • Chicken Cloner • Portable Water Tap • Portable Scareslime • Dash Pad • Fruit Slime Bait • Veggie Slime Bait • Meat Slime Bait |
| Decorations | Battery Tower • Digi Panel • Digi Shrub • Digi Tree • Field Kit • Supply Drop |
| Secret Style Paid DLC Pack | Secret Style Pack • Secret Style Treasure Pods |