m (→Rock Gordo #2) Tag: Visual edit |
m (Updated with new information. Beach Tabby Gordo still needs verification.) |
||
| (27 intermediate revisions by 5 users not shown) | |||
| Line 1: | Line 1: | ||
| − | {{ |
+ | {{FVideo}} |
| + | <small>''For the guide on Gold Gordo locations found only in Rush Mode, see: [[Rush Mode/Gold Gordo Locations]]''<br /></small> |
||
| − | |||
| + | {{LocationsTabber}} |
||
| + | [[File:Gordo Slime SP.png|thumb|''Bon appetit!'']] |
||
This page lists all of the 16 wild Gordo Slimes currently available in the game. |
This page lists all of the 16 wild Gordo Slimes currently available in the game. |
||
| Line 9: | Line 11: | ||
[[File:PinkGordoSP.png|100px|thumb|left]] |
[[File:PinkGordoSP.png|100px|thumb|left]] |
||
<center>''This Pink Gordo requires 30 of any [[Food]] item to burst.''</center> |
<center>''This Pink Gordo requires 30 of any [[Food]] item to burst.''</center> |
||
| + | <center>''In [[Rush Mode]] it requires 20 of any [[Food]] item to burst.''</center><br /> |
||
| − | <center>''When burst it drops 10 pure [[Pink Slime]]s, a [[Slime Key]] and two [[crate]]s |
+ | <center>''When burst, it drops 10 pure [[Pink Slime]]s, a [[Slime Key]] and two Dry Reef [[crate]]s.''</center> |
<br /> |
<br /> |
||
| − | |||
| − | |||
<gallery> |
<gallery> |
||
| Line 19: | Line 20: | ||
File:DryReefPinkGordo1Map.png |
File:DryReefPinkGordo1Map.png |
||
</gallery> |
</gallery> |
||
| − | |||
==='''Phosphor Gordo'''=== |
==='''Phosphor Gordo'''=== |
||
[[File:PhosphorGordoSP.png|100px|thumb|left]] |
[[File:PhosphorGordoSP.png|100px|thumb|left]] |
||
<center>''The Phosphor Gordo requires 50 [[Food|Fruit]] to burst.''</center> |
<center>''The Phosphor Gordo requires 50 [[Food|Fruit]] to burst.''</center> |
||
| − | <center>''[[ |
+ | <center>''In [[Rush Mode]] it requires 30 [[Food|Fruit]] to burst.''</center> |
| + | <center>''[[Cuberry|Cuberries]] count as two units.''</center> |
||
<br /> |
<br /> |
||
| − | <center>''It drops 10 pure [[Phosphor Slime]]s, a [[Slime Key]] and two [[crate]]s |
+ | <center>''It drops 10 pure [[Phosphor Slime]]s, a [[Slime Key]] and two Dry Reef [[crate]]s.''</center> |
<br /> |
<br /> |
||
| Line 40: | Line 41: | ||
[[File:TabbyGordoSP.png|100px|thumb|left]] |
[[File:TabbyGordoSP.png|100px|thumb|left]] |
||
<center>''This Tabby Gordo requires 50 [[Food|Meat]] to burst.''</center> |
<center>''This Tabby Gordo requires 50 [[Food|Meat]] to burst.''</center> |
||
| − | <center>''[[ |
+ | <center>''In [[Rush Mode]] it requires 1 [[Food|Meat]] to burst.''</center> |
| + | <center>''[[Stony Hen]]s count as two units.''</center> |
||
<br /> |
<br /> |
||
| − | <center>''It drops |
+ | <center>''It drops 11 pure [[Tabby Slime]]s, two Dry Reef [[crate]]s, and bursting it unblocks the two-way [[Static Teleporters|Static Teleporter]] to [[The Overgrowth]].''</center> |
<br /> |
<br /> |
||
| Line 54: | Line 56: | ||
==='''Tabby Gordo (The Beach)'''=== |
==='''Tabby Gordo (The Beach)'''=== |
||
[[File:TabbyGordoSP.png|100px|thumb|left]] |
[[File:TabbyGordoSP.png|100px|thumb|left]] |
||
| − | <center>'''''Note:''' |
+ | <center>'''''Note:''' In Adventure Mode, you must either buy [[The Overgrowth]] for 1,795 [[Newbucks]], or unlock the shortcut Slime Gate next to the Pink Rock feral canyon to access The Beach.''</center><br /> |
| − | <br /> |
||
<center>''This Tabby Gordo requires 50 [[Food|Meat]] to burst.''</center> |
<center>''This Tabby Gordo requires 50 [[Food|Meat]] to burst.''</center> |
||
| − | <center>''[[ |
+ | <center>''In [[Rush Mode]] it requires 1 [[Food|Meat]] to burst.''</center> |
| + | <center>''[[Stony Hen]]s count as two units.''</center> |
||
| − | ''<br />'' |
||
| + | |||
| ⚫ | |||
| + | |||
| ⚫ | |||
<gallery> |
<gallery> |
||
| Line 66: | Line 69: | ||
File:DryReefTabbyGordo2Map.png |
File:DryReefTabbyGordo2Map.png |
||
</gallery> |
</gallery> |
||
| − | |||
==='''Pink Gordo (Ring Island)'''=== |
==='''Pink Gordo (Ring Island)'''=== |
||
| Line 74: | Line 76: | ||
<center>''This Pink Gordo requires 30 of any [[Food]] item to burst.''</center> |
<center>''This Pink Gordo requires 30 of any [[Food]] item to burst.''</center> |
||
| − | <center>'' |
+ | <center>''In [[Rush Mode]] it requires 20 of any [[Food]] item to burst.''</center> |
| + | |||
| + | |||
| + | <center>''It drops 10 pure [[Pink Slime]]s, a [[Slime Key]] and two Dry Reef [[crate]]s.''</center> |
||
<br /> |
<br /> |
||
| Line 85: | Line 90: | ||
==[[The Moss Blanket]]== |
==[[The Moss Blanket]]== |
||
| − | <center>'''''Note:''' You must either |
+ | <center>'''''Note:''' You must either have the [[Vacpack#Upgrades|Jetpack upgrade]] to skip the gate, or burst a Gordo holding a [[Slime Key]] to access The Moss Blanket.''</center> |
<br /> |
<br /> |
||
==='''Honey Gordo'''=== |
==='''Honey Gordo'''=== |
||
[[File:HoneyGordoSP.png|100px|thumb|left]] |
[[File:HoneyGordoSP.png|100px|thumb|left]] |
||
<center>''The Honey Gordo requires 50 [[Food|Fruit]] to burst.''</center> |
<center>''The Honey Gordo requires 50 [[Food|Fruit]] to burst.''</center> |
||
| − | <center>''[[ |
+ | <center>''In [[Rush Mode]] it requires 30 [[Food|Fruit]] to burst.''</center> |
| + | <center>''[[Mint Mango]]es count as two units.''</center> |
||
<br /> |
<br /> |
||
| − | <center>''It drops 10 pure [[Honey Slime]]s, a [[Slime Key]], and |
+ | <center>''It drops 10 pure [[Honey Slime]]s, a [[Slime Key]], and two Moss Blanket [[crate]]s.''</center> |
<br /> |
<br /> |
||
| Line 105: | Line 111: | ||
[[File:HunterGordoSP.png|100px|thumb|left]] |
[[File:HunterGordoSP.png|100px|thumb|left]] |
||
<center>''The Hunter Gordo requires 50 [[Food|Meat]] to burst.''</center> |
<center>''The Hunter Gordo requires 50 [[Food|Meat]] to burst.''</center> |
||
| − | <center>''[[ |
+ | <center>''In [[Rush Mode]] it requires 30 [[Food|Meat]] to burst.''</center> |
| + | <center>''[[Roostro]]s count as two units.''</center> |
||
<br /> |
<br /> |
||
| − | <center>''It drops |
+ | <center>''It drops 9 pure [[Hunter Slime]]s, a [[Slime Key]], and three [[crate]]s; one contains four to five common-to-uncommon [[Slime Science Resources]], the last two are Moss Blanket crates.<br />In Rush Mode, all the crates are random loot.''</center> |
<br /> |
<br /> |
||
| Line 122: | Line 129: | ||
[[File:RockGordoSP.png|100px|thumb|left]] |
[[File:RockGordoSP.png|100px|thumb|left]] |
||
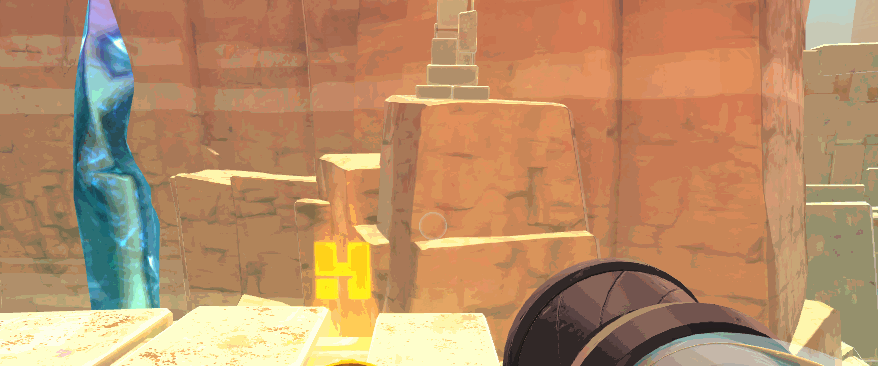
<center>''The first Rock Gordo requires 50 [[Food|Veggies]] to burst''</center> |
<center>''The first Rock Gordo requires 50 [[Food|Veggies]] to burst''</center> |
||
| − | <center>''[[ |
+ | <center>''In [[Rush Mode]] it requires 1 [[Food|Veggie]] to burst.''</center> |
| + | <center>''[[Heart Beet]]s count as two units.''</center> |
||
''<br />'' |
''<br />'' |
||
| − | <center>''It drops 10 pure [[Rock Slime]]s, three [[crate]]s |
+ | <center>''It drops 10 pure [[Rock Slime]]s, three Indigo Quarry [[crate]]s, and bursting it unblocks the two-way [[Static Teleporters|Static Teleporter]] to [[The Grotto]].''</center> |
<br /> |
<br /> |
||
| Line 137: | Line 145: | ||
[[File:RockGordoSP.png|100px|thumb|left]] |
[[File:RockGordoSP.png|100px|thumb|left]] |
||
<center>''The second Rock Gordo requires 50 [[Food|Veggies]] to burst''</center> |
<center>''The second Rock Gordo requires 50 [[Food|Veggies]] to burst''</center> |
||
| − | <center>''[[ |
+ | <center>''In [[Rush Mode]] it requires 1 [[Food|Veggie]] to burst.''</center> |
| + | <center>''[[Heart Beet]]s count as two units.''</center> |
||
''<br />'' |
''<br />'' |
||
| − | <center>''It drops 10 pure [[Rock Slime]]s, three [[crate]]s |
+ | <center>''It drops 10 pure [[Rock Slime]]s, three Indigo Quarry [[crate]]s, and bursting it unblocks the two-way [[Static Teleporters|Static Teleporter]] to [[The Indigo Quarry/Ash Isle|Ash Isle]].''</center> |
<br /> |
<br /> |
||
| Line 151: | Line 160: | ||
[[File:RadGordoSP.png|100px|thumb|left]] |
[[File:RadGordoSP.png|100px|thumb|left]] |
||
<center>''The Rad Gordo requires 50 [[Food|Veggies]] to burst''</center> |
<center>''The Rad Gordo requires 50 [[Food|Veggies]] to burst''</center> |
||
| − | <center>''[[ |
+ | <center>''In [[Rush Mode]] it requires 30 [[Food|Veggies]] to burst.''</center> |
| + | <center>''[[Oca Oca]]s count as two units.''</center> |
||
<br /> |
<br /> |
||
| − | <center>''It drops 10 pure [[Rad Slime]]s, a [[Slime Key]], and two [[crate]]s |
+ | <center>''It drops 10 pure [[Rad Slime]]s, a [[Slime Key]], and two Indigo Quarry [[crate]]s.''</center><center>''The Rad Gordo exudes a Rad aura of a much larger size than [[Rad Slime]]s; additionally it cannot be neutralised with [[Water]].''</center> |
<br /> |
<br /> |
||
| Line 160: | Line 170: | ||
File:IndigoQuarryRadGordoMap.png |
File:IndigoQuarryRadGordoMap.png |
||
</gallery> |
</gallery> |
||
| + | |||
| + | [[File:IndigoQuarryRadGordoCaveLocation.gif|300px|center]] |
||
==='''Crystal Gordo'''=== |
==='''Crystal Gordo'''=== |
||
| Line 165: | Line 177: | ||
<center>'''''Note:''' The [[Gordo Slimes/Locations#Rock Gordo #2|second Rock Gordo]] must be burst to access [[The Indigo Quarry/Ash Isle|Ash Isle]].''<br /></center> |
<center>'''''Note:''' The [[Gordo Slimes/Locations#Rock Gordo #2|second Rock Gordo]] must be burst to access [[The Indigo Quarry/Ash Isle|Ash Isle]].''<br /></center> |
||
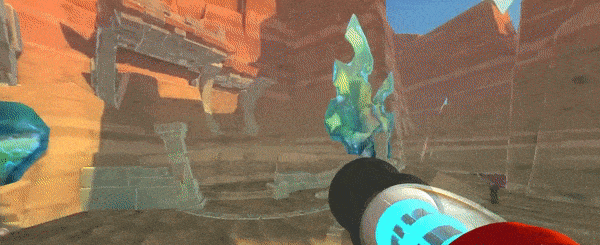
<center>''The Crystal Gordo requires 50 [[Food|Veggies]] to burst.''</center> |
<center>''The Crystal Gordo requires 50 [[Food|Veggies]] to burst.''</center> |
||
| − | <center>''[[ |
+ | <center>''In [[Rush Mode]] it requires 30 [[Food|Veggies]] to burst.''</center> |
| + | <center>''[[Odd Onion]]s counts as two units.''</center> |
||
<br /> |
<br /> |
||
| − | <center>''It drops |
+ | <center>''It drops 9 pure [[Crystal Slime]]s, a [[Slime Key]] and three [[crate]]s; one contains four-to-five common-to-uncommon random [[Slime Science Resources]] while the last two are Indigo Quarry crates. In Rush Mode, all the crates are random loot. The Gordo is sitting on top of a hole going into the cave underneath; all of the drops except the [[Slime Key]] are likely to fall through it when burst.''</center> |
<br /> |
<br /> |
||
| Line 183: | Line 196: | ||
[[File:BoomGordoSP.png|100px|thumb|left]] |
[[File:BoomGordoSP.png|100px|thumb|left]] |
||
<center>''The Boom Gordo requires 50 [[Food|Meat]] to burst''</center> |
<center>''The Boom Gordo requires 50 [[Food|Meat]] to burst''</center> |
||
| − | <center>''[[ |
+ | <center>''In [[Rush Mode]] it requires 30 [[Food|Meat]] to burst.''</center> |
| + | <center>''[[Briar Hen]]s count as two units.''</center> |
||
<br /> |
<br /> |
||
| − | <center>''It drops 10 pure [[Boom Slime]]s, a [[Slime Key]], and two [[crate]]s |
+ | <center>''It drops 10 pure [[Boom Slime]]s, a [[Slime Key]], and two Ancient Ruins [[crate]]s.''</center> |
| − | <center>'''''Note: The Boom Gordo |
+ | <center>'''''Note: The Boom Gordo is located behind a glass door, which may or may not be lowered. If it is, flip any switch in the Ancient Ruins to remove it. In addition, <font color = red>the Gordo when burst makes a huge explosion which deals heavy damage if you are in the blast radius.</font>'''''</center> |
<br /> |
<br /> |
||
| Line 199: | Line 213: | ||
[[File:QuantumGordoSP.png|100px|thumb|left]] |
[[File:QuantumGordoSP.png|100px|thumb|left]] |
||
<center>''The Quantum Gordo requires 50 [[Food|Fruit]] to burst.''</center> |
<center>''The Quantum Gordo requires 50 [[Food|Fruit]] to burst.''</center> |
||
| − | <center>''[[ |
+ | <center>''In [[Rush Mode]] it requires 30 [[Food|Fruit]] to burst.''</center> |
| + | <center>''[[Phase Lemon]]s count as two units.''</center><br /> |
||
| − | <center>''It drops 10 pure [[Quantum Slime]]s, a [[Slime Key]] and two [[crate]]s |
+ | <center>''It drops 10 pure [[Quantum Slime]]s, a [[Slime Key]] and two Ancient Ruins [[crate]]s.''</center> |
| + | |||
| − | <br /><br /> |
||
| + | <center>'''''Note: A glass door may be blocking the Gordo. To remove it, simply flip the switch directly above it.'''''</center>''<br />'' |
||
<gallery>File:AncientRuinsQuantumGordo.png |
<gallery>File:AncientRuinsQuantumGordo.png |
||
File:AncientRuinsQuantumGordoMap.png</gallery> |
File:AncientRuinsQuantumGordoMap.png</gallery> |
||
| − | [[File:Quantum Gordo|centre|thumb|300x300px]] |
||
==[[The Glass Desert]]== |
==[[The Glass Desert]]== |
||
| Line 214: | Line 229: | ||
==='''Dervish Gordo'''=== |
==='''Dervish Gordo'''=== |
||
[[File:DervishGordoSP.png|100px|thumb|left]] |
[[File:DervishGordoSP.png|100px|thumb|left]] |
||
| − | <center>''The Dervish Gordo requires 50 [[Food|Fruit]] to burst |
+ | <center>''The Dervish Gordo requires 50 [[Food|Fruit]] to burst.''</center> |
| + | <center>''In [[Rush Mode]] it requires 30 [[Food|Fruit]] to burst.''</center> |
||
| + | <center>''[[Prickle Pear]]s count as two units.''</center> |
||
<br /> |
<br /> |
||
| − | <center>''It drops |
+ | <center>''It drops 9 pure [[Dervish Slime]]s, a [[Slime Key]], and three [[crate]]s; one contains four to five random [[Slime Science Resources]] while the last two are Desert crates.<br />In Rush Mode, all the crates are random loot.''</center> |
<br /> |
<br /> |
||
| Line 224: | Line 241: | ||
File:GlassDesertDervishGordoMap.png |
File:GlassDesertDervishGordoMap.png |
||
</gallery> |
</gallery> |
||
| − | |||
| − | [[File:Slime Rancher Tutorial - Where To Find The Dervish Gordo|centre|thumb|300x300px]] |
||
==='''Tangle Gordo'''=== |
==='''Tangle Gordo'''=== |
||
[[File:TangleGordoSP.png|100px|thumb|left]] |
[[File:TangleGordoSP.png|100px|thumb|left]] |
||
| − | <center>''The Tangle Gordo requires 50 [[Food|Meat]] to burst. |
+ | <center>''The Tangle Gordo requires 50 [[Food|Meat]] to burst.</center> |
| + | <center>''In [[Rush Mode]] it requires 1 [[Food|Meat]] to burst.''</center> |
||
| + | <center>''[[Painted Hen]]s count as two units.''</center> |
||
<br /> |
<br /> |
||
| − | <center>''It drops 10 pure [[Tangle Slime]]s and three [[crate]]s; one contains four-to-five common-to-uncommon [[Slime Science Resources]] while the |
+ | <center>''It drops 10 pure [[Tangle Slime]]s and three [[crate]]s; one contains four-to-five common-to-uncommon [[Slime Science Resources]] while the last two are Desert crates.<br />Bursting it also unblocks the one-way [[Static Teleporters|Static Teleporter]] to [[The Ranch]].''</center> |
<br /> |
<br /> |
||
| Line 239: | Line 256: | ||
File:GlassDesertTangleGordoMap.png |
File:GlassDesertTangleGordoMap.png |
||
</gallery> |
</gallery> |
||
| − | |||
==='''Mosaic Gordo'''=== |
==='''Mosaic Gordo'''=== |
||
[[File:MosaicGordoSP.png|100px|thumb|left]] |
[[File:MosaicGordoSP.png|100px|thumb|left]] |
||
| − | <center>''The Mosaic Gordo requires 50 [[Food|Veggies]] to burst. |
+ | <center>''The Mosaic Gordo requires 50 [[Food|Veggies]] to burst.''</center> |
| − | <center>[[ |
+ | <center>''In [[Rush Mode]] it requires 30 [[Food|Veggies]] to burst.''</center> |
| + | <center>[[Silver Parsnip]]s count as two units.</center> |
||
<br /> |
<br /> |
||
| − | <center>''It drops |
+ | <center>''It drops 9 pure [[Mosaic Slime]]s, a [[Slime Key]], and three [[crate]]s; one contains four-to-five common-to-uncommon [[Slime Science Resources]] while the last two are Desert crates.<br />In Rush Mode, all the crates are random loot.''</center><br /> |
<gallery> |
<gallery> |
||
File:GlassDesertMosaicGordo.png |
File:GlassDesertMosaicGordo.png |
||
File:GlassDesertMosaicGordoMap.png |
File:GlassDesertMosaicGordoMap.png |
||
| − | </gallery> |
+ | </gallery>{{clr}} |
| + | |||
| − | [[File:Mosaic2490582.gif|center|Getting to the Mosaic Gordo|300px]] |
||
| + | |||
| + | [[File:Mosaic_Gordo_possible_route1.gif|320px|left]][[File:Mosaic_Gordo_possible_route2.gif|320px|right]] |
||
| + | |||
{{navbox}} |
{{navbox}} |
||
Revision as of 16:48, 1 May 2019
Template:FVideo
For the guide on Gold Gordo locations found only in Rush Mode, see: Rush Mode/Gold Gordo Locations


Bon appetit!
This page lists all of the 16 wild Gordo Slimes currently available in the game.
Since the World Map is very simplistic prior to being unlocked using Map Data Nodes and this page uses fully-unlocked maps to pinpoint locations, it is recommended to activate each area's Map node first before proceeding.
The Dry Reef
Pink Gordo


")
")
Phosphor Gordo


")
")
Tabby Gordo


")
")
Tabby Gordo (The Beach)
")
")
Pink Gordo (Ring Island)
")
")
The Moss Blanket
Honey Gordo

")
")
Hunter Gordo


In Rush Mode, all the crates are random loot.
")
")
The Indigo Quarry
Rock Gordo #1


")
")
Rock Gordo #2
")
")
Rad Gordo


")
")
Crystal Gordo


")
")
The Ancient Ruins
Boom Gordo


")
")
Quantum Gordo


")
")
The Glass Desert
Dervish Gordo


In Rush Mode, all the crates are random loot.
")
")
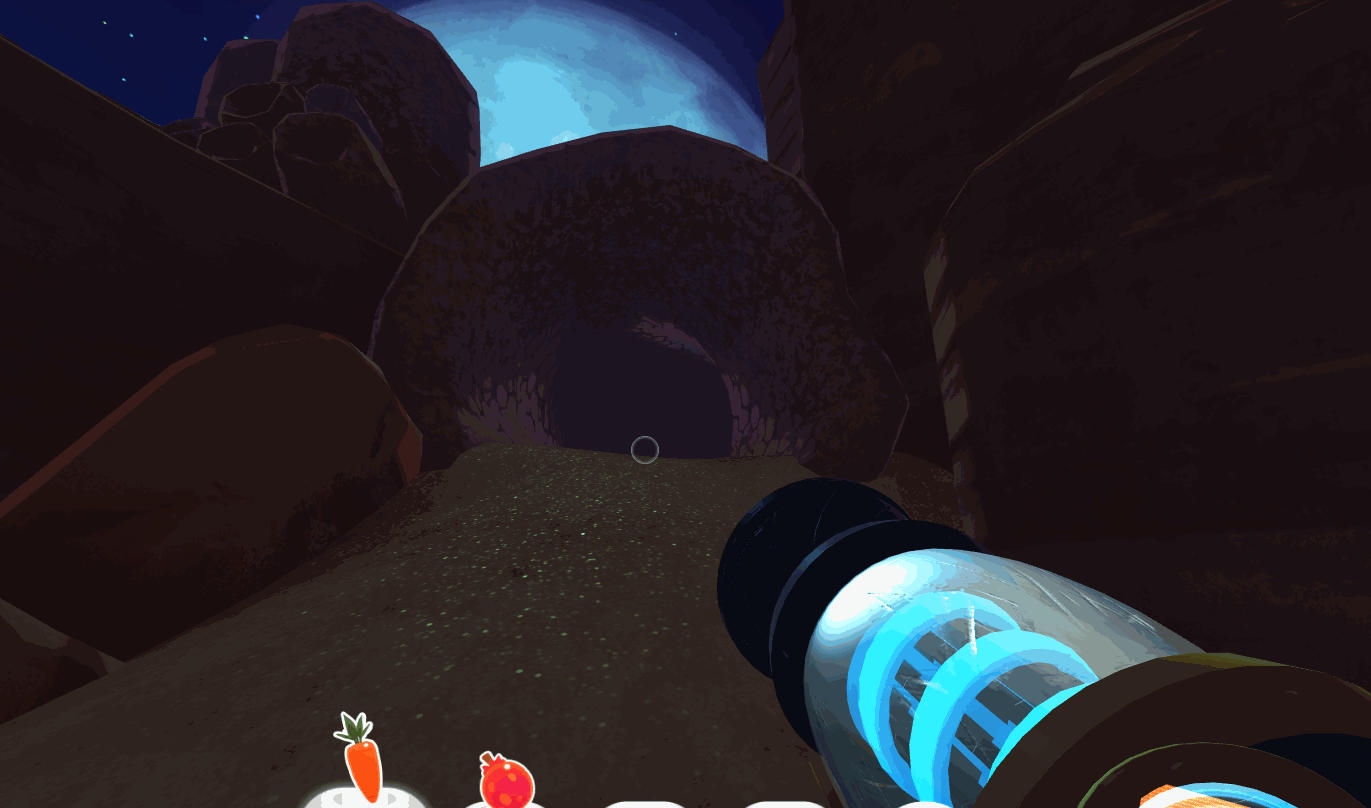
Tangle Gordo


Bursting it also unblocks the one-way Static Teleporter to The Ranch.
")
")
Mosaic Gordo


In Rush Mode, all the crates are random loot.
")
")