m (Numbr) |
mNo edit summary |
||
| (8 intermediate revisions by 4 users not shown) | |||
| Line 1: | Line 1: | ||
| ⚫ | |||
| − | {{incomplete|Missing 1 location.}} __FORCETOC__ |
||
[[File:GildedGinger SP.png|right|250px]] |
[[File:GildedGinger SP.png|right|250px]] |
||
| + | |||
| ⚫ | |||
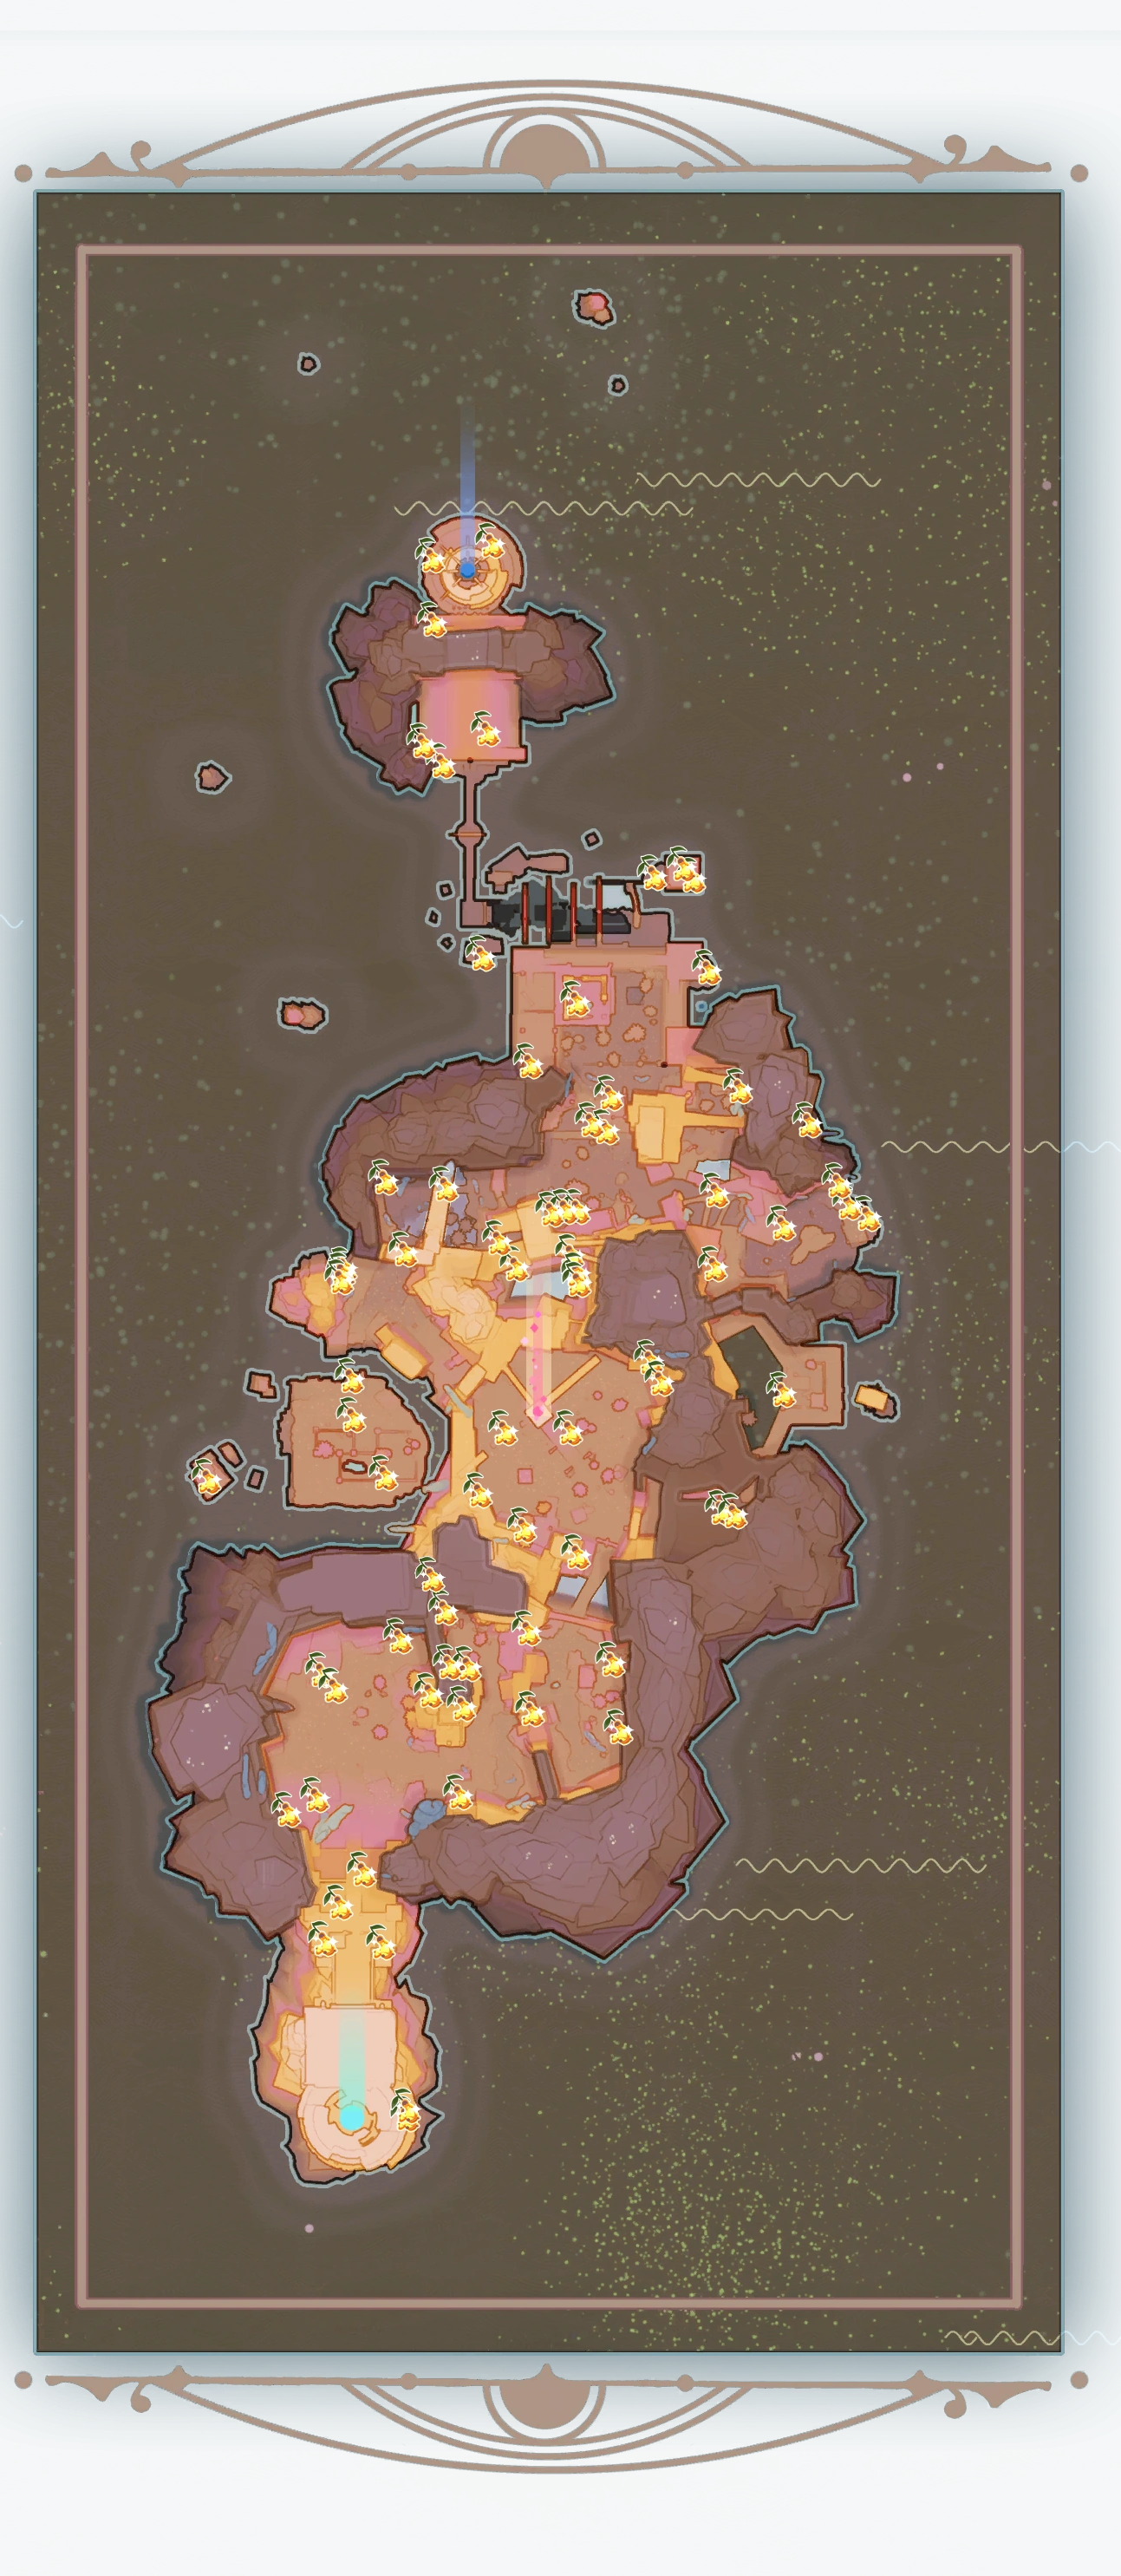
| + | Two '''Gilded Gingers''' can spawn in any of the 74 possible locations on a given day. |
||
| − | There are 74 possible locations where the Gilded Ginger can spawn in a day.<br/> |
||
Since the in-game map is very simplistic prior to being unlocked using [[Map Data Nodes]] and this page uses fully-unlocked maps to pinpoint locations, it is recommended to activate the Desert's Map node first before proceeding. |
Since the in-game map is very simplistic prior to being unlocked using [[Map Data Nodes]] and this page uses fully-unlocked maps to pinpoint locations, it is recommended to activate the Desert's Map node first before proceeding. |
||
| − | + | Some images may have multiple ''Gilded Gingers'' to showcase that a single location has multiple spawn points. |
|
==Map== |
==Map== |
||
| Line 64: | Line 64: | ||
|- |
|- |
||
|<center>'''#13'''</center> |
|<center>'''#13'''</center> |
||
| + | |[[File:GG74.png|200px]] |
||
| + | |[[File:GG74map.png|150px]] |
||
| + | |- |
||
| + | |<center>'''#14'''</center> |
||
|[[File:GG13.png|200px]] |
|[[File:GG13.png|200px]] |
||
|[[File:GG13map.png|150px]] |
|[[File:GG13map.png|150px]] |
||
|- |
|- |
||
| − | |<center>'''# |
+ | |<center>'''#15'''</center> |
|[[File:GG14.png|200px]] |
|[[File:GG14.png|200px]] |
||
|[[File:GG14map.png|150px]] |
|[[File:GG14map.png|150px]] |
||
|- |
|- |
||
| − | |<center>'''# |
+ | |<center>'''#16'''</center> |
|[[File:GG15.png|200px]] |
|[[File:GG15.png|200px]] |
||
|[[File:GG15map.png|150px]] |
|[[File:GG15map.png|150px]] |
||
|- |
|- |
||
| − | |<center>'''# |
+ | |<center>'''#17'''</center> |
|[[File:GG16.png|200px]] |
|[[File:GG16.png|200px]] |
||
|[[File:GG16map.png|150px]] |
|[[File:GG16map.png|150px]] |
||
|- |
|- |
||
| − | |<center>'''# |
+ | |<center>'''#18'''</center> |
|[[File:GG17.png|200px]] |
|[[File:GG17.png|200px]] |
||
|[[File:GG17map.png|150px]] |
|[[File:GG17map.png|150px]] |
||
|- |
|- |
||
| − | |<center>'''# |
+ | |<center>'''#19'''</center> |
|[[File:GG18.png|200px]] |
|[[File:GG18.png|200px]] |
||
|[[File:GG18map.png|150px]] |
|[[File:GG18map.png|150px]] |
||
|- |
|- |
||
| − | |<center>'''# |
+ | |<center>'''#20'''</center> |
|[[File:GG19.png|200px]] |
|[[File:GG19.png|200px]] |
||
|[[File:GG19map.png|150px]] |
|[[File:GG19map.png|150px]] |
||
|- |
|- |
||
| − | |<center>'''# |
+ | |<center>'''#21'''</center> |
|[[File:GG20.png|200px]] |
|[[File:GG20.png|200px]] |
||
|[[File:GG20map.png|150px]] |
|[[File:GG20map.png|150px]] |
||
|- |
|- |
||
| − | |<center>'''# |
+ | |<center>'''#22'''</center> |
|[[File:GG21.png|200px]] |
|[[File:GG21.png|200px]] |
||
|[[File:GG21map.png|150px]] |
|[[File:GG21map.png|150px]] |
||
| Line 109: | Line 113: | ||
!<center>Map</center> |
!<center>Map</center> |
||
|- |
|- |
||
| − | |<center>'''# |
+ | |<center>'''#23'''</center> |
|[[File:GG22.png|200px]] |
|[[File:GG22.png|200px]] |
||
|[[File:GG22map.png|150px]] |
|[[File:GG22map.png|150px]] |
||
|- |
|- |
||
| − | |<center>'''# |
+ | |<center>'''#24'''</center> |
|[[File:GG23.png|200px]] |
|[[File:GG23.png|200px]] |
||
|[[File:GG23map.png|150px]] |
|[[File:GG23map.png|150px]] |
||
|- |
|- |
||
| − | |<center>'''# |
+ | |<center>'''#25'''</center> |
|[[File:GG24.png|200px]] |
|[[File:GG24.png|200px]] |
||
|[[File:GG24map.png|150px]] |
|[[File:GG24map.png|150px]] |
||
|- |
|- |
||
| − | |<center>'''# |
+ | |<center>'''#26'''</center> |
|[[File:GG25.png|200px]] |
|[[File:GG25.png|200px]] |
||
|[[File:GG25map.png|150px]] |
|[[File:GG25map.png|150px]] |
||
|- |
|- |
||
| − | |<center>'''# |
+ | |<center>'''#27'''</center> |
|[[File:GG26.png|200px]] |
|[[File:GG26.png|200px]] |
||
|[[File:GG26map.png|150px]] |
|[[File:GG26map.png|150px]] |
||
|- |
|- |
||
| − | |<center>'''# |
+ | |<center>'''#28'''</center> |
|[[File:GG27.png|200px]] |
|[[File:GG27.png|200px]] |
||
|[[File:GG27map.png|150px]] |
|[[File:GG27map.png|150px]] |
||
|- |
|- |
||
| − | |<center>'''# |
+ | |<center>'''#29'''</center> |
|[[File:GG28.png|200px]] |
|[[File:GG28.png|200px]] |
||
|[[File:GG28map.png|150px]] |
|[[File:GG28map.png|150px]] |
||
|- |
|- |
||
| − | |<center>'''# |
+ | |<center>'''#30'''</center> |
|[[File:GG29.png|200px]] |
|[[File:GG29.png|200px]] |
||
|[[File:GG29map.png|150px]] |
|[[File:GG29map.png|150px]] |
||
| Line 151: | Line 155: | ||
!<center>Map</center> |
!<center>Map</center> |
||
|- |
|- |
||
| − | |<center>'''# |
+ | |<center>'''#31'''</center> |
|[[File:GG30.png|200px]] |
|[[File:GG30.png|200px]] |
||
|[[File:GG30map.png|150px]] |
|[[File:GG30map.png|150px]] |
||
| Line 165: | Line 169: | ||
!<center>Map</center> |
!<center>Map</center> |
||
|- |
|- |
||
| − | |<center>'''# |
+ | |<center>'''#32'''</center> |
|[[File:GG31.png|200px]] |
|[[File:GG31.png|200px]] |
||
|[[File:GG31map.png|150px]] |
|[[File:GG31map.png|150px]] |
||
|- |
|- |
||
| − | |<center>'''# |
+ | |<center>'''#33'''</center> |
|[[File:GG32.png|200px]] |
|[[File:GG32.png|200px]] |
||
|[[File:GG32map.png|150px]] |
|[[File:GG32map.png|150px]] |
||
|- |
|- |
||
| − | |<center>'''# |
+ | |<center>'''#34'''</center> |
|[[File:GG33.png|200px]] |
|[[File:GG33.png|200px]] |
||
|[[File:GG33map.png|150px]] |
|[[File:GG33map.png|150px]] |
||
|- |
|- |
||
| − | |<center>'''# |
+ | |<center>'''#35'''</center> |
|[[File:GG34.png|200px]] |
|[[File:GG34.png|200px]] |
||
|[[File:GG34map.png|150px]] |
|[[File:GG34map.png|150px]] |
||
|- |
|- |
||
| − | |<center>'''# |
+ | |<center>'''#36, #37,<br />and #38'''</center> |
|[[File:GG35&36&37.png|200px]] |
|[[File:GG35&36&37.png|200px]] |
||
|[[File:GG35&36&37map.png|150px]] |
|[[File:GG35&36&37map.png|150px]] |
||
|- |
|- |
||
| − | |<center>'''# |
+ | |<center>'''#39'''</center> |
|[[File:GG38.png|200px]] |
|[[File:GG38.png|200px]] |
||
|[[File:GG38map.png|150px]] |
|[[File:GG38map.png|150px]] |
||
|- |
|- |
||
| − | |<center>'''# |
+ | |<center>'''#40'''</center> |
|[[File:GG39.png|200px]] |
|[[File:GG39.png|200px]] |
||
|[[File:GG39map.png|150px]] |
|[[File:GG39map.png|150px]] |
||
|- |
|- |
||
| − | |<center>'''# |
+ | |<center>'''#41'''</center> |
|[[File:GG40.png|200px]] |
|[[File:GG40.png|200px]] |
||
|[[File:GG40map.png|150px]] |
|[[File:GG40map.png|150px]] |
||
|- |
|- |
||
| − | |<center>'''# |
+ | |<center>'''#42'''</center> |
|[[File:GG41.png|200px]] |
|[[File:GG41.png|200px]] |
||
|[[File:GG41map.png|150px]] |
|[[File:GG41map.png|150px]] |
||
| Line 211: | Line 215: | ||
!<center>Map</center> |
!<center>Map</center> |
||
|- |
|- |
||
| − | |<center>'''# |
+ | |<center>'''#43'''</center> |
|[[File:GG42.png|200px]] |
|[[File:GG42.png|200px]] |
||
|[[File:GG42map.png|150px]] |
|[[File:GG42map.png|150px]] |
||
|- |
|- |
||
| − | |<center>'''# |
+ | |<center>'''#44'''</center> |
|[[File:GG43.png|200px]] |
|[[File:GG43.png|200px]] |
||
|[[File:GG43map.png|150px]] |
|[[File:GG43map.png|150px]] |
||
|- |
|- |
||
| − | |<center>'''# |
+ | |<center>'''#45 and #46'''</center> |
|[[File:GG44&45.png|200px]] |
|[[File:GG44&45.png|200px]] |
||
|[[File:GG44&45map.png|150px]] |
|[[File:GG44&45map.png|150px]] |
||
|- |
|- |
||
| − | |<center>'''# |
+ | |<center>'''#47'''</center> |
|[[File:GG46.png|200px]] |
|[[File:GG46.png|200px]] |
||
|[[File:GG46map.png|150px]] |
|[[File:GG46map.png|150px]] |
||
|- |
|- |
||
| − | |<center>'''# |
+ | |<center>'''#48'''</center> |
|[[File:GG47.png|200px]] |
|[[File:GG47.png|200px]] |
||
|[[File:GG47map.png|150px]] |
|[[File:GG47map.png|150px]] |
||
|- |
|- |
||
| − | |<center>'''# |
+ | |<center>'''#49'''</center> |
|[[File:GG48.png|200px]] |
|[[File:GG48.png|200px]] |
||
|[[File:GG48map.png|150px]] |
|[[File:GG48map.png|150px]] |
||
|- |
|- |
||
| − | |<center>'''# |
+ | |<center>'''#50'''</center> |
|[[File:GG49.png|200px]] |
|[[File:GG49.png|200px]] |
||
|[[File:GG49map.png|150px]] |
|[[File:GG49map.png|150px]] |
||
|- |
|- |
||
| − | |<center>'''# |
+ | |<center>'''#51'''</center> |
|[[File:GG50.png|200px]] |
|[[File:GG50.png|200px]] |
||
|[[File:GG50map.png|150px]] |
|[[File:GG50map.png|150px]] |
||
|- |
|- |
||
| − | |<center>'''# |
+ | |<center>'''#52'''</center> |
|[[File:GG51.png|200px]] |
|[[File:GG51.png|200px]] |
||
|[[File:GG51map.png|150px]] |
|[[File:GG51map.png|150px]] |
||
|- |
|- |
||
| − | |<center>'''# |
+ | |<center>'''#53'''</center> |
|[[File:GG52.png|200px]] |
|[[File:GG52.png|200px]] |
||
|[[File:GG52map.png|150px]] |
|[[File:GG52map.png|150px]] |
||
|- |
|- |
||
| − | |<center>'''# |
+ | |<center>'''#54'''</center> |
|[[File:GG53.png|200px]] |
|[[File:GG53.png|200px]] |
||
|[[File:GG53map.png|150px]] |
|[[File:GG53map.png|150px]] |
||
|- |
|- |
||
| − | |<center>'''# |
+ | |<center>'''#55 and #56'''</center> |
|[[File:GG54&55.png|200px]] |
|[[File:GG54&55.png|200px]] |
||
|[[File:GG54&55map.png|150px]] |
|[[File:GG54&55map.png|150px]] |
||
|- |
|- |
||
| − | |<center>'''# |
+ | |<center>'''#57'''</center> |
|[[File:GG56.png|200px]] |
|[[File:GG56.png|200px]] |
||
|[[File:GG56map.png|150px]] |
|[[File:GG56map.png|150px]] |
||
|- |
|- |
||
| − | |<center>'''# |
+ | |<center>'''#58'''</center> |
|[[File:GG57.png|200px]] |
|[[File:GG57.png|200px]] |
||
|[[File:GG57map.png|150px]] |
|[[File:GG57map.png|150px]] |
||
| Line 273: | Line 277: | ||
|+ |
|+ |
||
|- |
|- |
||
| + | !<center>Number</center> |
||
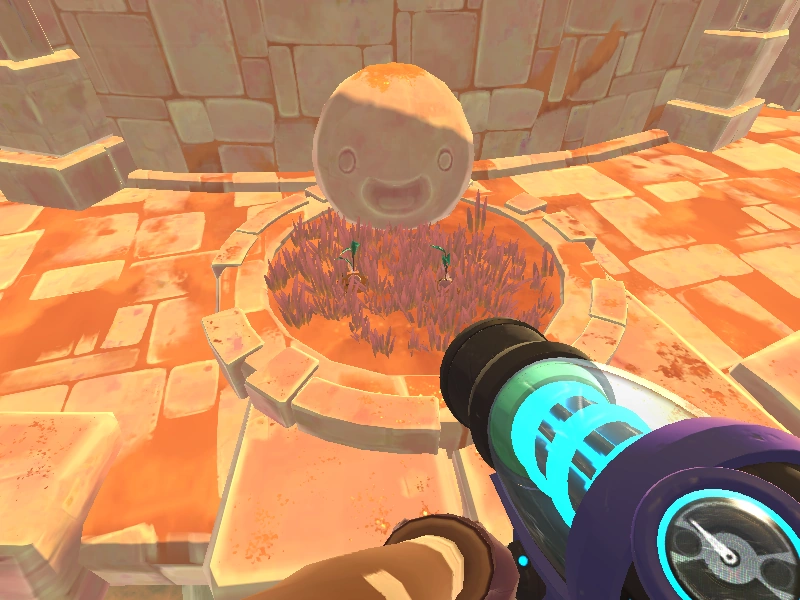
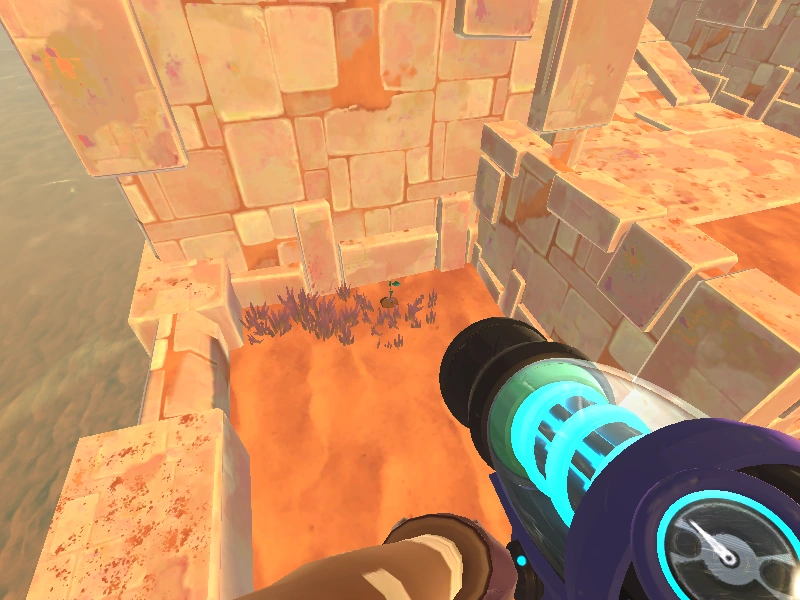
!<center>In-game screenshot</center> |
!<center>In-game screenshot</center> |
||
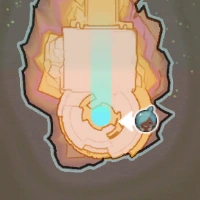
!<center>Map</center> |
!<center>Map</center> |
||
|- |
|- |
||
| − | |<center>'''# |
+ | |<center>'''#59'''</center> |
|[[File:GG58.png|200px]] |
|[[File:GG58.png|200px]] |
||
|[[File:GG58map.png|150px]] |
|[[File:GG58map.png|150px]] |
||
|- |
|- |
||
| − | |<center>'''# |
+ | |<center>'''#60'''</center> |
|[[File:GG59.png|200px]] |
|[[File:GG59.png|200px]] |
||
|[[File:GG59map.png|150px]] |
|[[File:GG59map.png|150px]] |
||
|- |
|- |
||
| − | |<center>'''# |
+ | |<center>'''#61 and #62'''</center> |
|[[File:GG60&61.png|200px]] |
|[[File:GG60&61.png|200px]] |
||
|[[File:GG60&61map.png|150px]] |
|[[File:GG60&61map.png|150px]] |
||
|- |
|- |
||
| − | |<center>'''# |
+ | |<center>'''#63'''</center> |
|[[File:GG62.png|200px]] |
|[[File:GG62.png|200px]] |
||
|[[File:GG62map.png|150px]] |
|[[File:GG62map.png|150px]] |
||
| Line 297: | Line 302: | ||
|+ |
|+ |
||
|- |
|- |
||
| + | !<center>Number</center> |
||
!<center>In-game screenshot</center> |
!<center>In-game screenshot</center> |
||
!<center>Map</center> |
!<center>Map</center> |
||
|- |
|- |
||
| − | |<center>'''# |
+ | |<center>'''#64'''</center> |
|[[File:GG63.png|200px]] |
|[[File:GG63.png|200px]] |
||
|[[File:GG63map.png|150px]] |
|[[File:GG63map.png|150px]] |
||
|- |
|- |
||
| − | |<center>'''# |
+ | |<center>'''#65'''</center> |
|[[File:GG64.png|200px]] |
|[[File:GG64.png|200px]] |
||
|[[File:GG64map.png|150px]] |
|[[File:GG64map.png|150px]] |
||
|- |
|- |
||
| − | |<center>'''# |
+ | |<center>'''#66'''</center> |
|[[File:GG65.png|200px]] |
|[[File:GG65.png|200px]] |
||
|[[File:GG65map.png|150px]] |
|[[File:GG65map.png|150px]] |
||
|- |
|- |
||
| − | |<center>'''# |
+ | |<center>'''#67'''</center> |
|[[File:GG66.png|200px]] |
|[[File:GG66.png|200px]] |
||
|[[File:GG66map.png|150px]] |
|[[File:GG66map.png|150px]] |
||
|- |
|- |
||
| − | |<center>'''# |
+ | |<center>'''#68'''</center> |
|[[File:GG67.png|200px]] |
|[[File:GG67.png|200px]] |
||
|[[File:GG67map.png|150px]] |
|[[File:GG67map.png|150px]] |
||
|- |
|- |
||
| − | |<center>'''# |
+ | |<center>'''#69'''</center> |
|[[File:GG68.png|200px]] |
|[[File:GG68.png|200px]] |
||
|[[File:GG68map.png|150px]] |
|[[File:GG68map.png|150px]] |
||
|- |
|- |
||
| − | |<center>'''# |
+ | |<center>'''#70'''</center> |
|[[File:GG69.png|200px]] |
|[[File:GG69.png|200px]] |
||
|[[File:GG69map.png|150px]] |
|[[File:GG69map.png|150px]] |
||
|- |
|- |
||
| − | |<center>'''# |
+ | |<center>'''#71'''</center> |
|[[File:GG70.png|200px]] |
|[[File:GG70.png|200px]] |
||
|[[File:GG70map.png|150px]] |
|[[File:GG70map.png|150px]] |
||
|- |
|- |
||
| − | |<center>'''# |
+ | |<center>'''#72'''</center> |
|[[File:GG71.png|200px]] |
|[[File:GG71.png|200px]] |
||
|[[File:GG71map.png|150px]] |
|[[File:GG71map.png|150px]] |
||
|- |
|- |
||
| − | |<center>'''# |
+ | |<center>'''#73'''</center> |
|[[File:GG72.png|200px]] |
|[[File:GG72.png|200px]] |
||
|[[File:GG72map.png|150px]] |
|[[File:GG72map.png|150px]] |
||
|- |
|- |
||
| − | |<center>'''# |
+ | |<center>'''#74'''</center> |
|[[File:GG73.png|200px]] |
|[[File:GG73.png|200px]] |
||
|[[File:GG73map.png|150px]] |
|[[File:GG73map.png|150px]] |
||
| Line 346: | Line 352: | ||
| + | |||
| − | {{navbox}} |
||
| + | {{NavboxNavigationUpdate}} |
||
| + | {{Navbox}} |
||
[[Category:Pages with map locations]] |
[[Category:Pages with map locations]] |
||
[[Category:Exclusive to The Glass Desert]] |
[[Category:Exclusive to The Glass Desert]] |
||
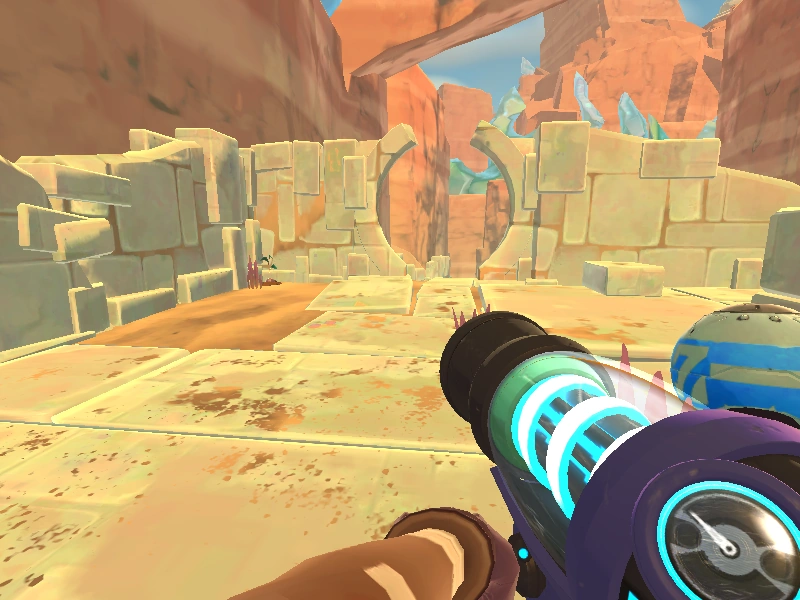
Latest revision as of 23:11, 4 December 2018

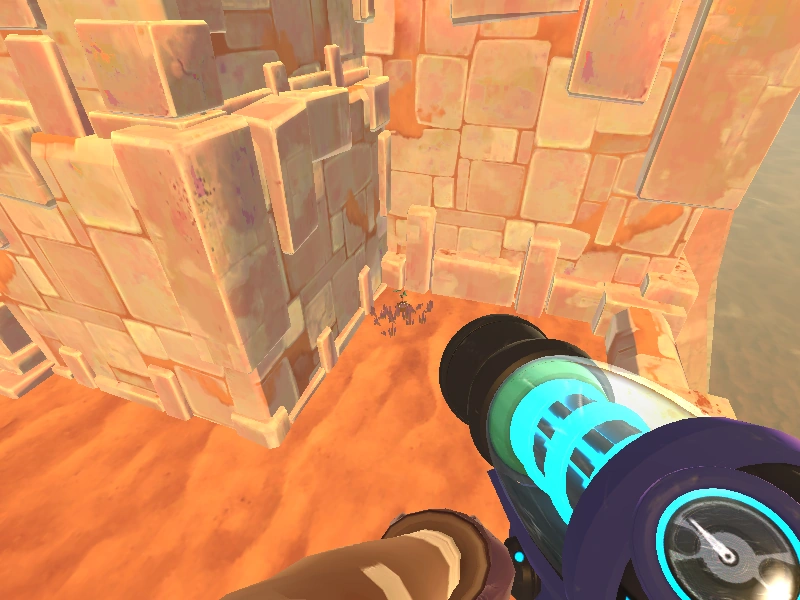
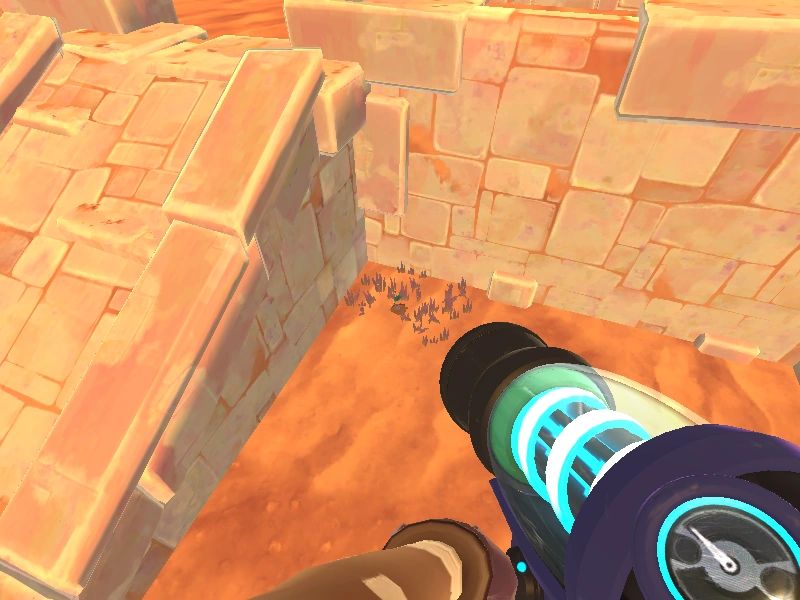
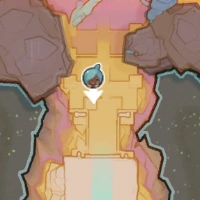
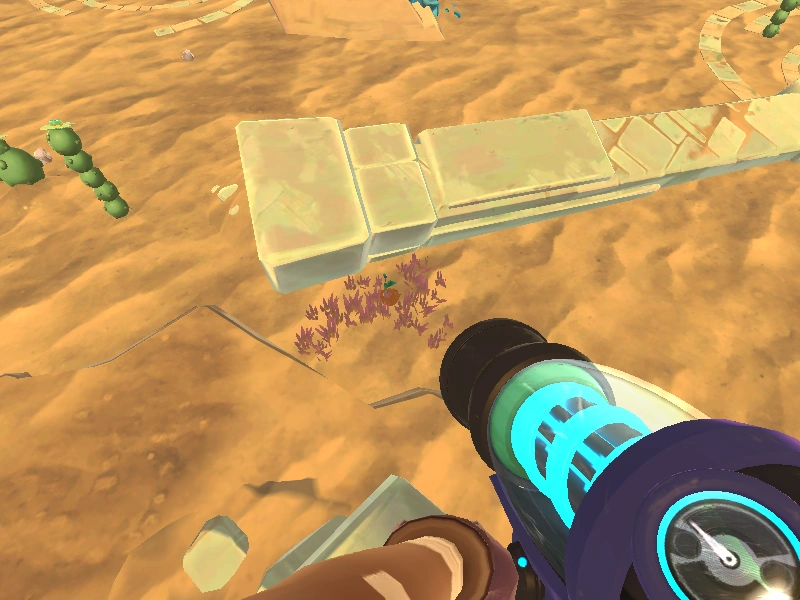
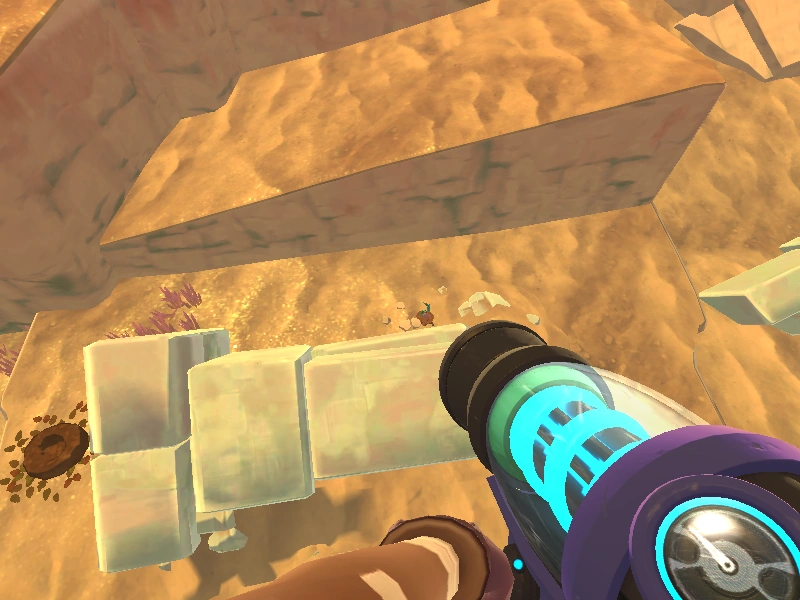
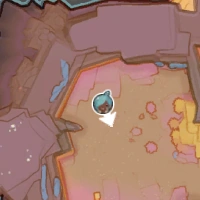
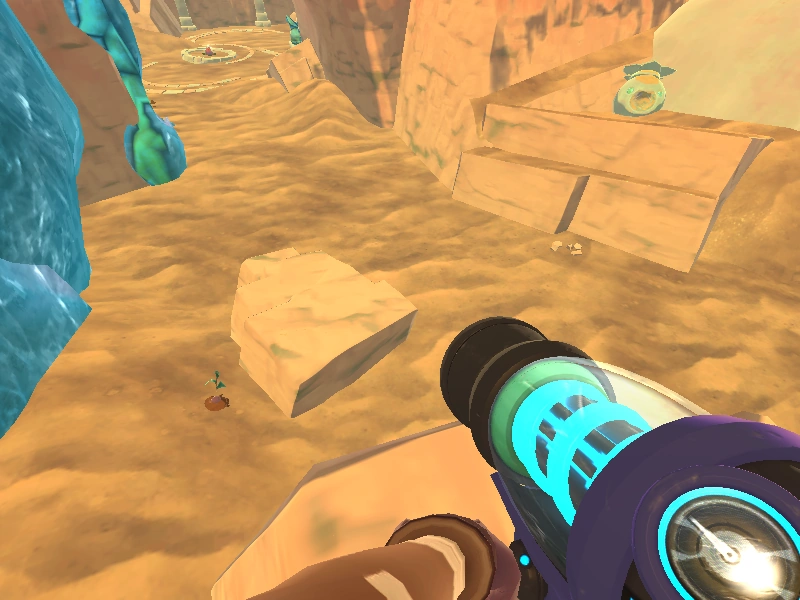
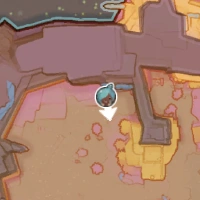
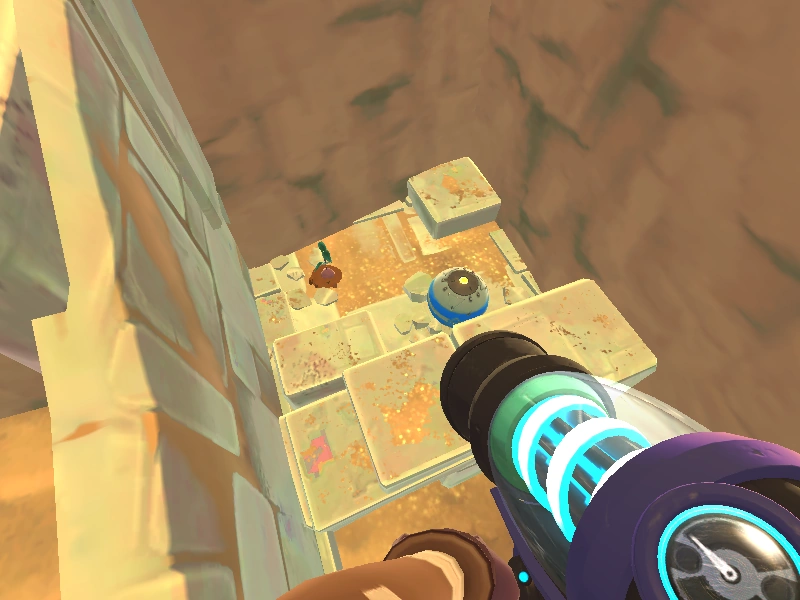
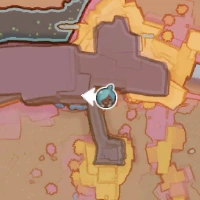
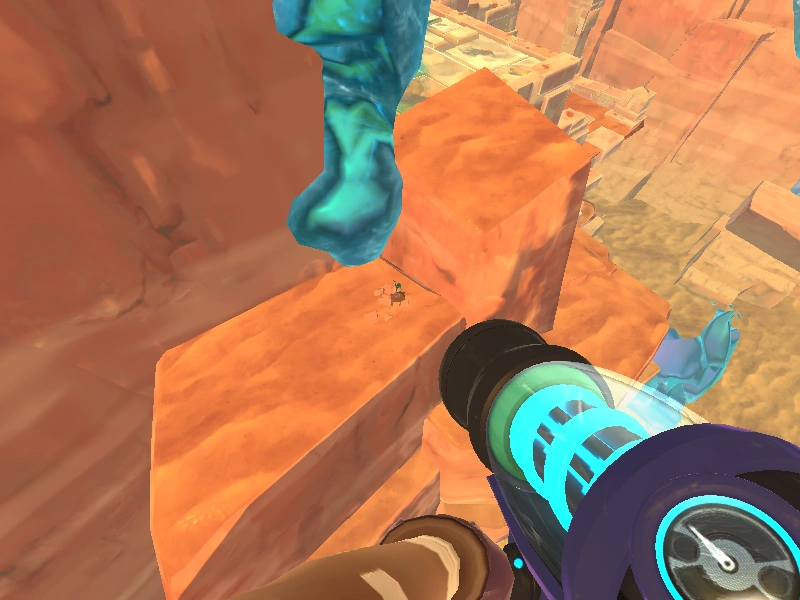
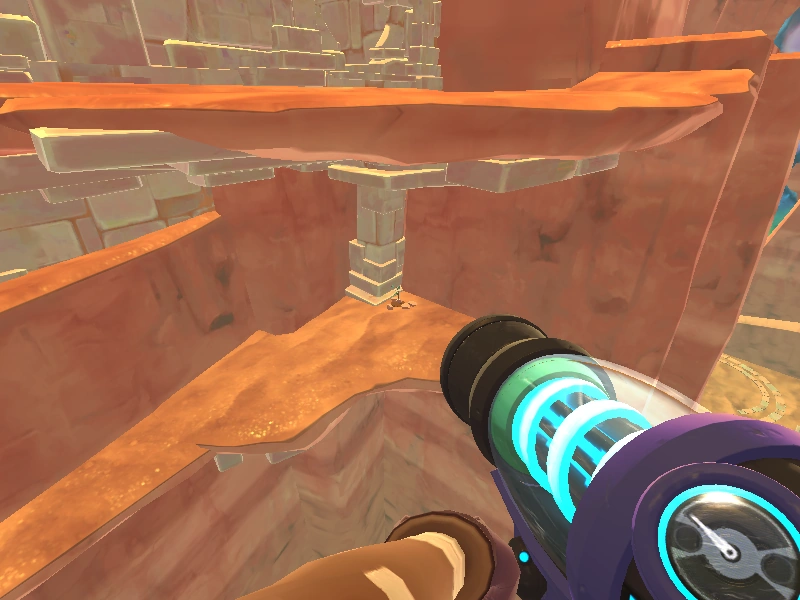
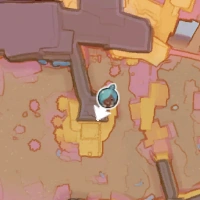
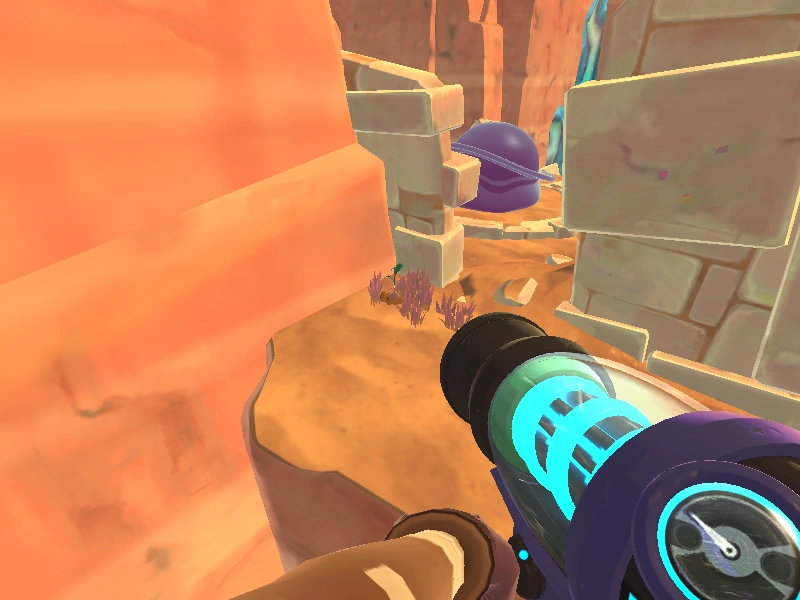
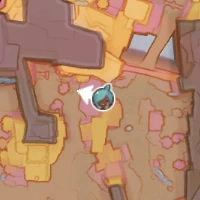
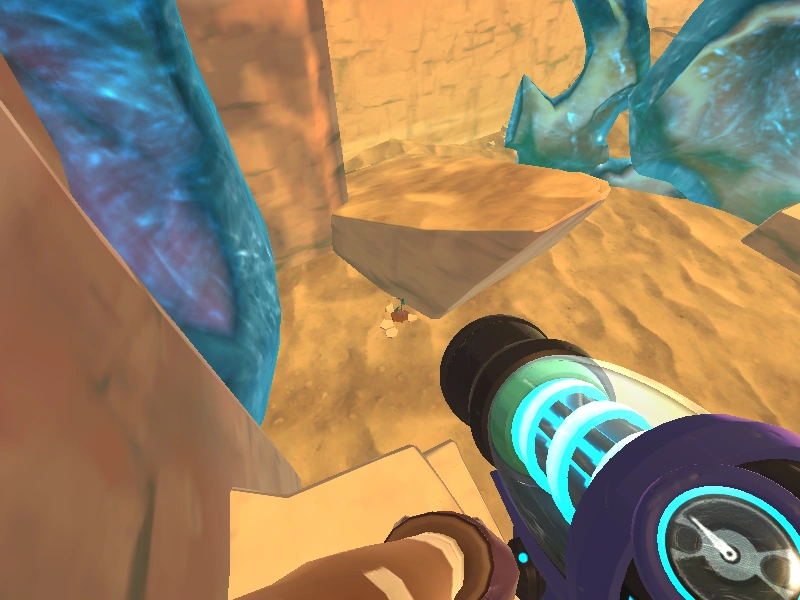
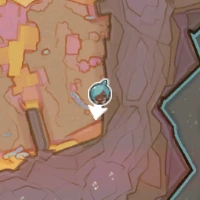
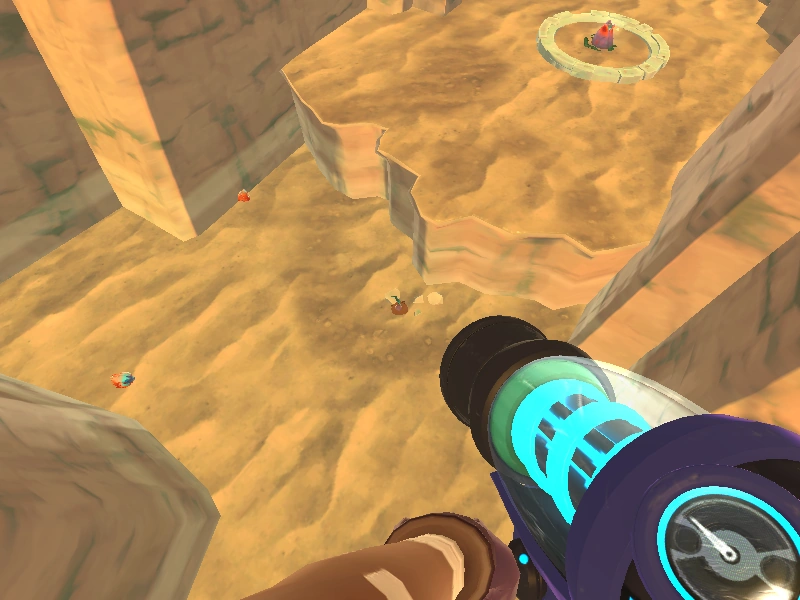
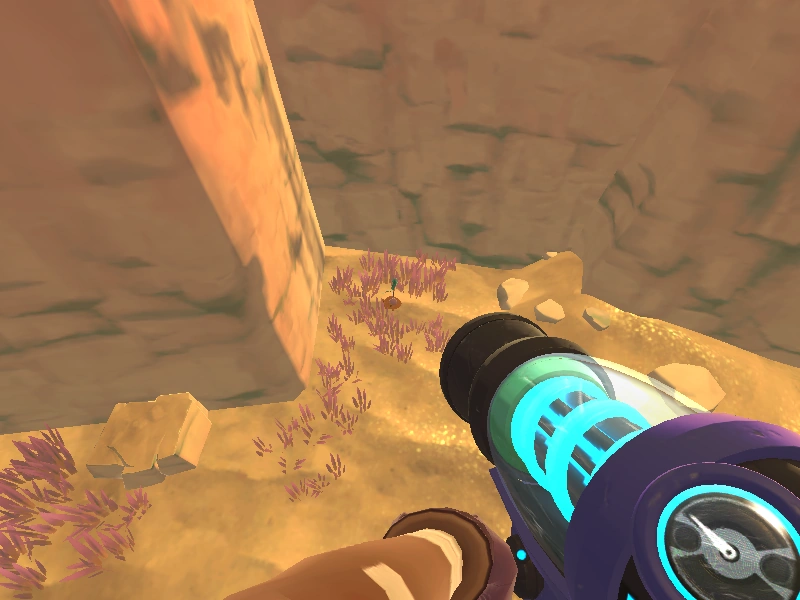
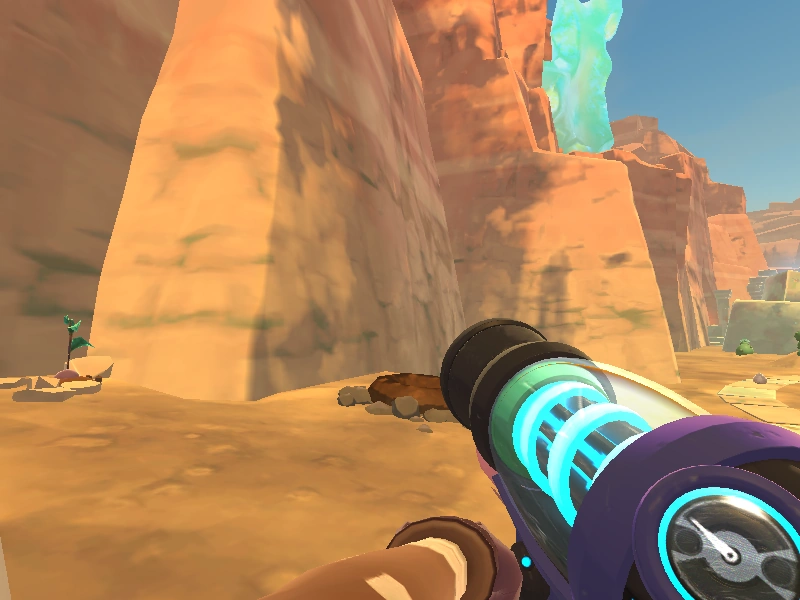
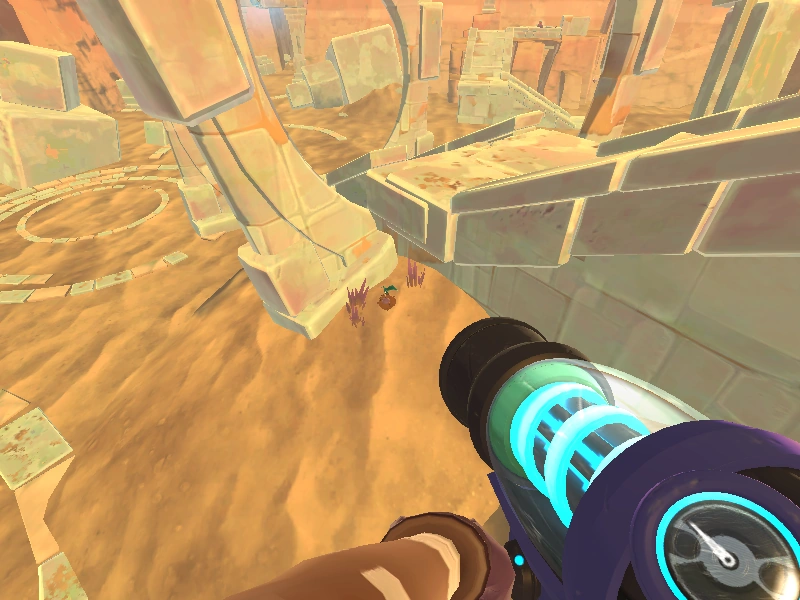
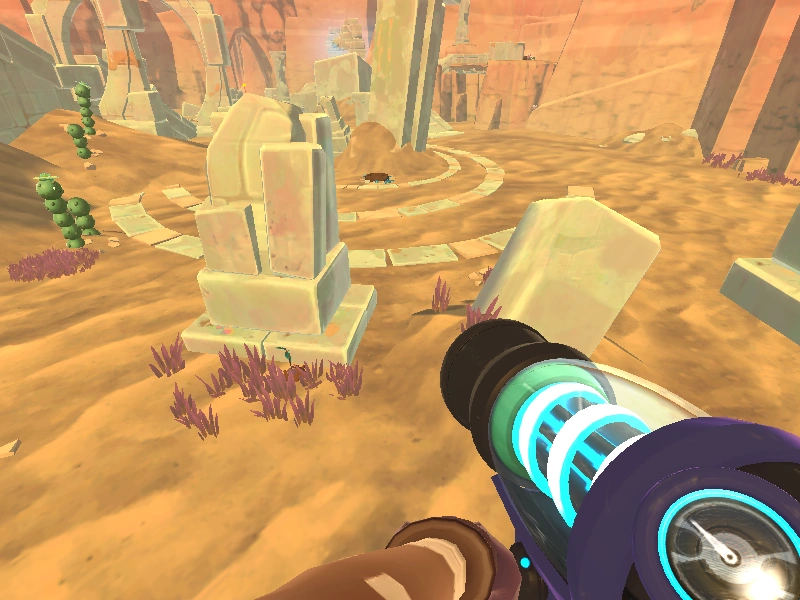
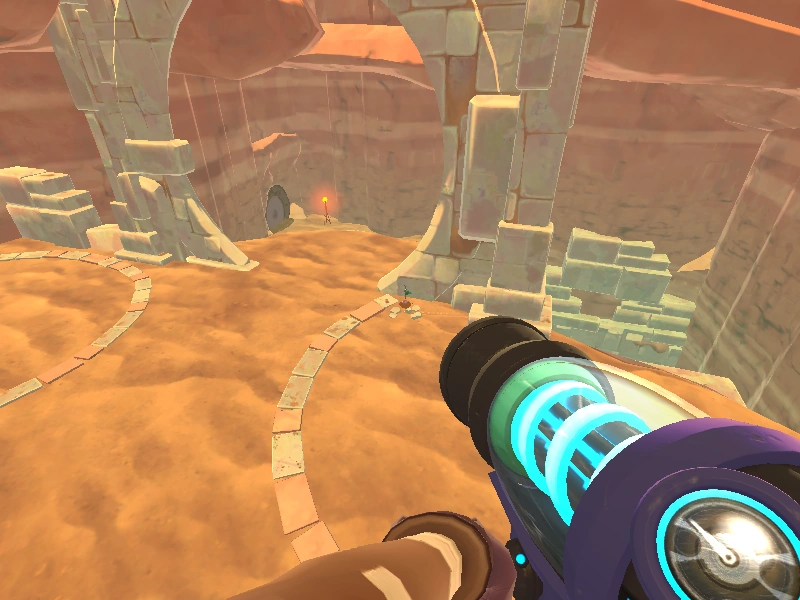
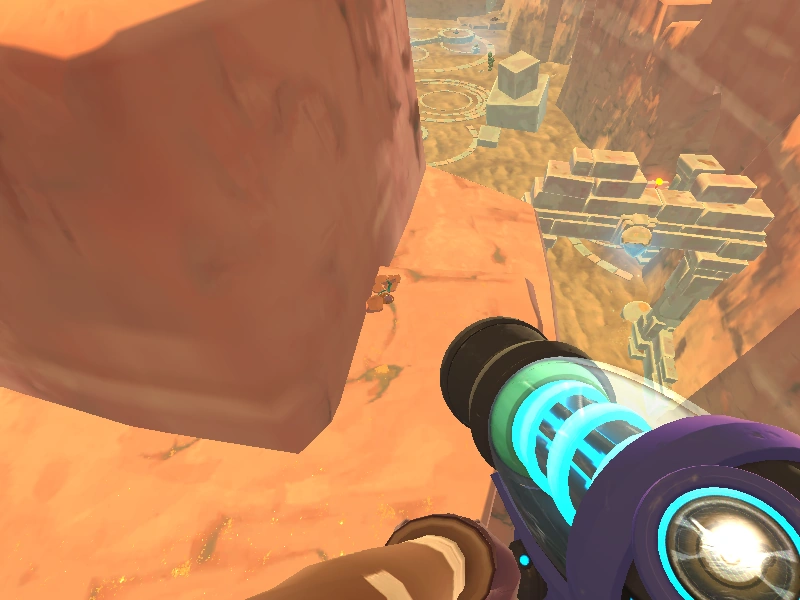
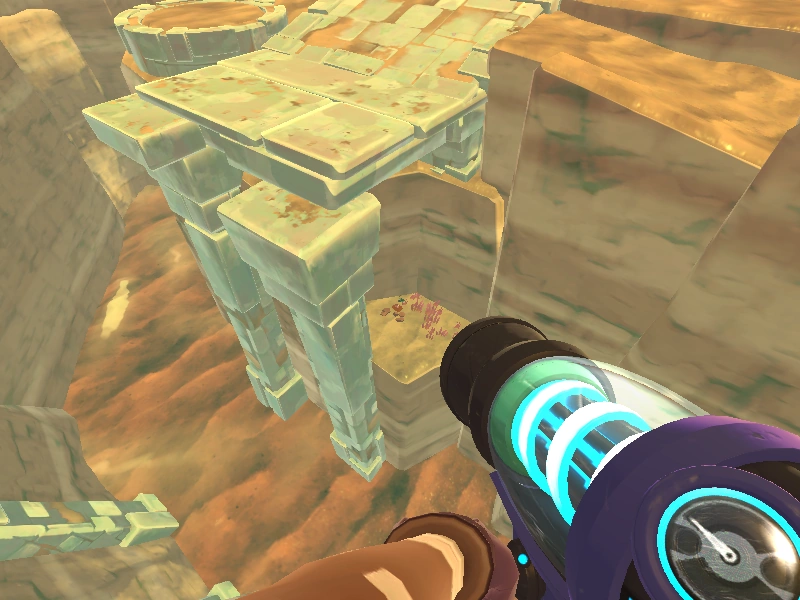
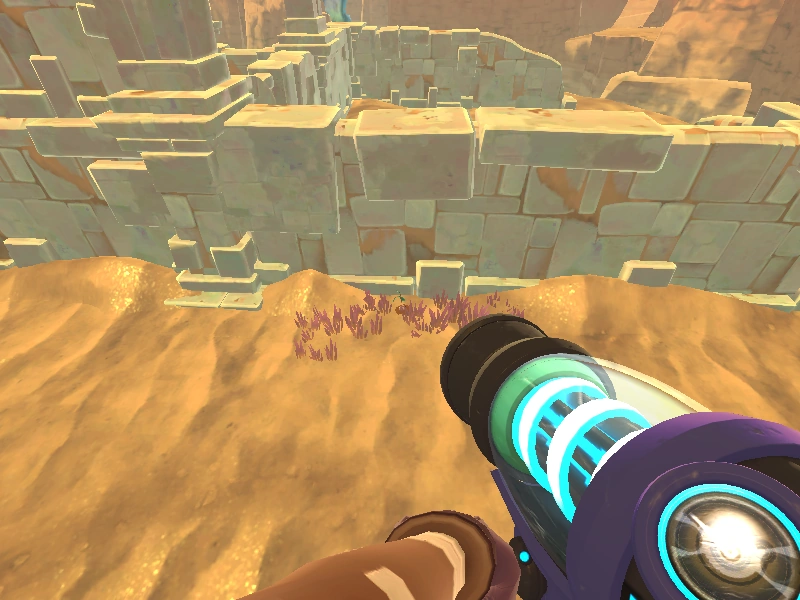
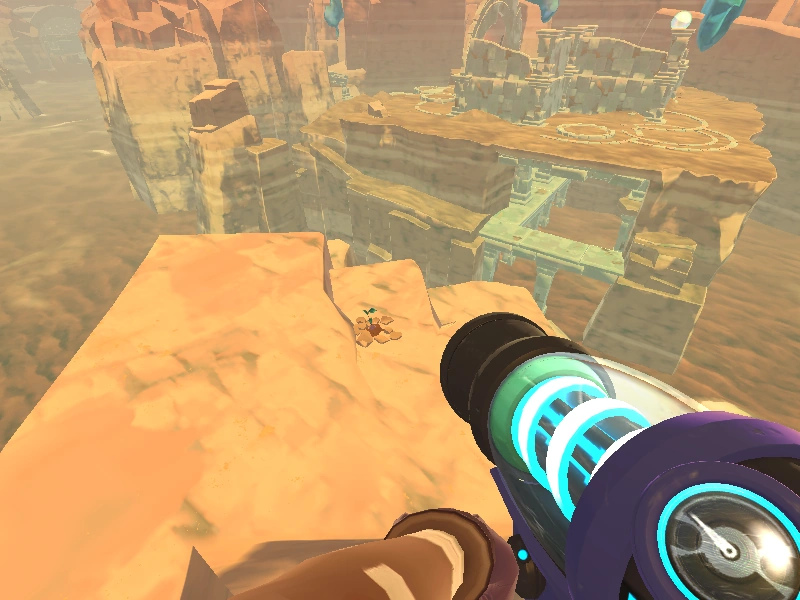
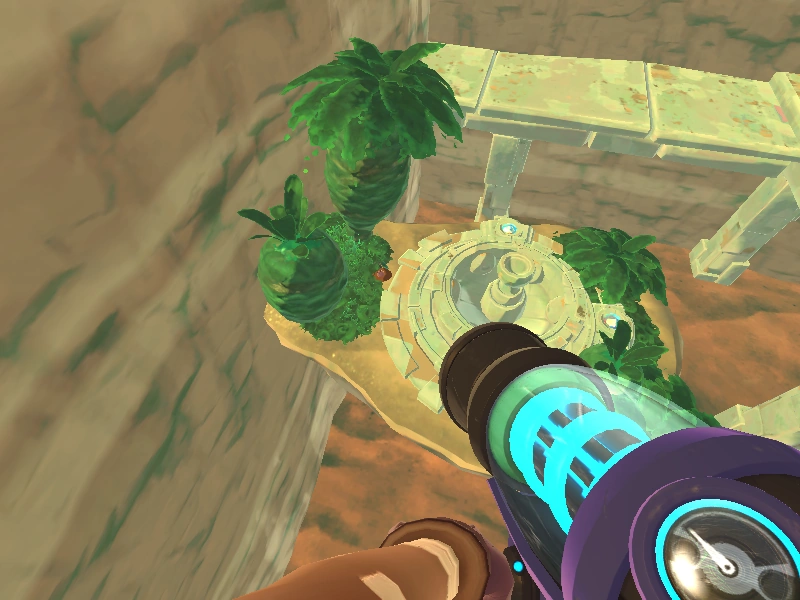
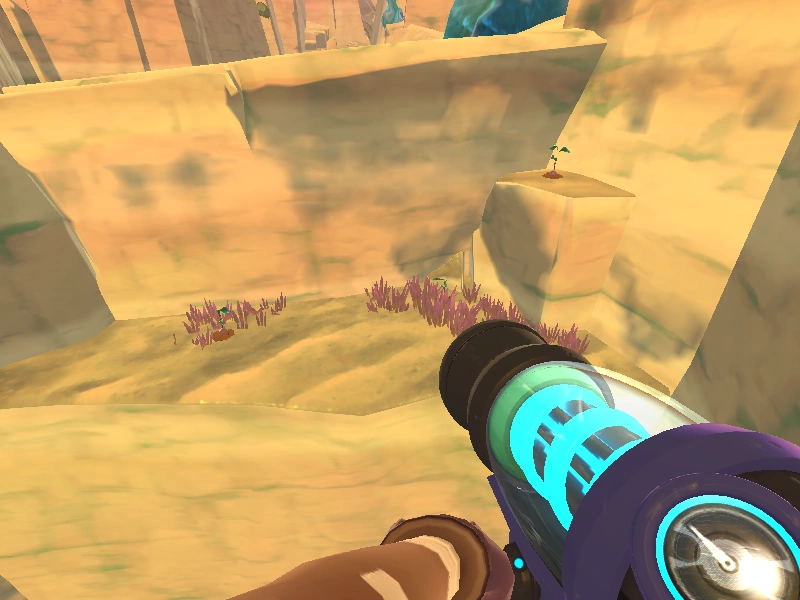
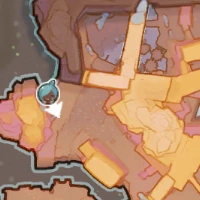
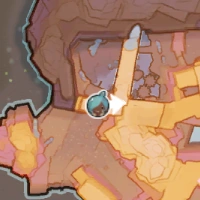
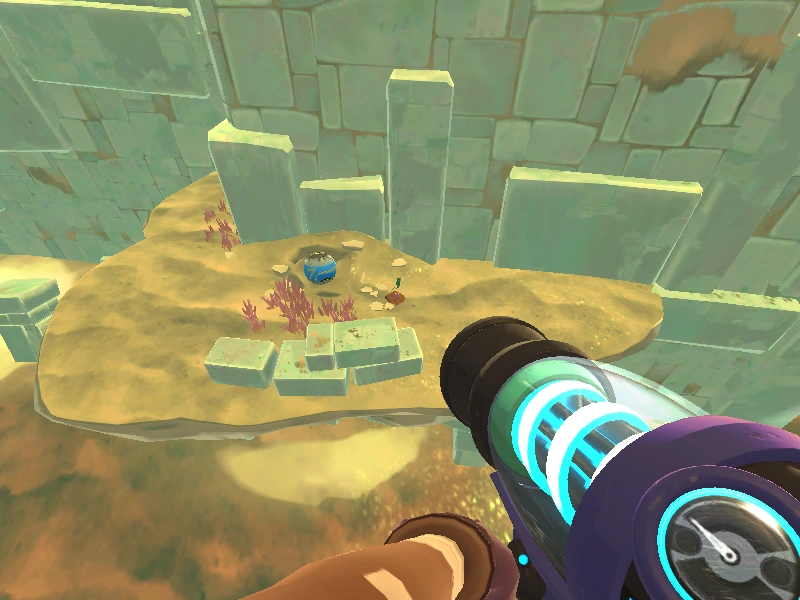
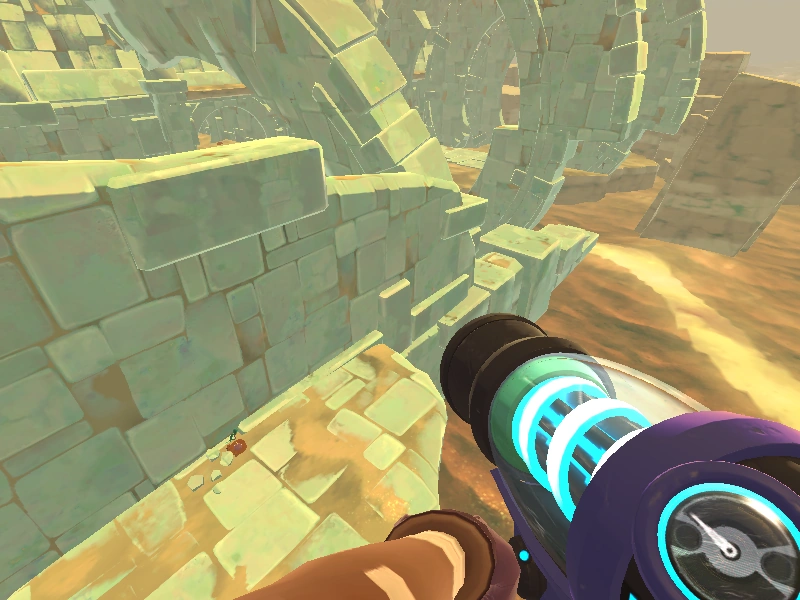
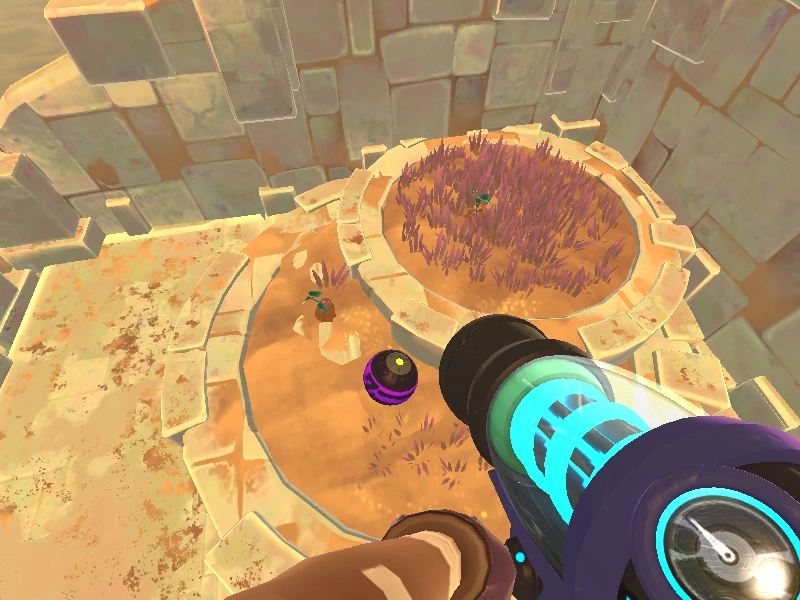
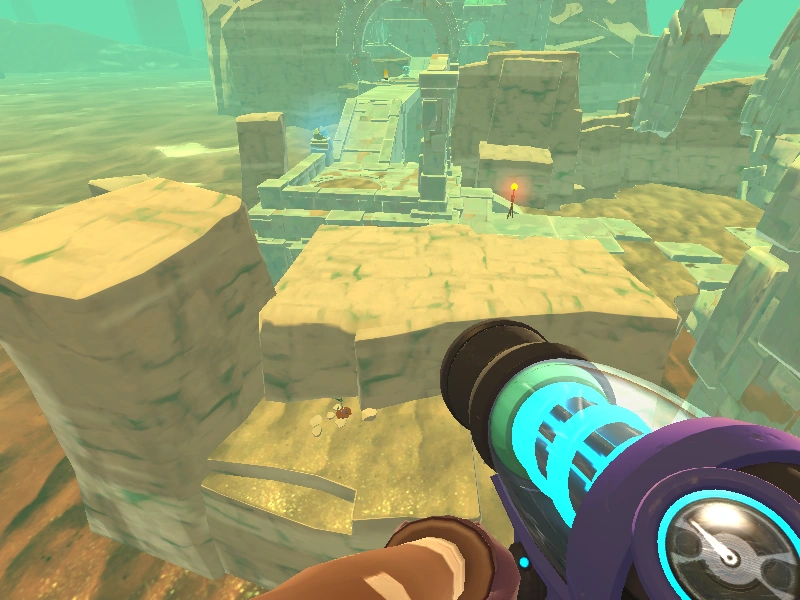
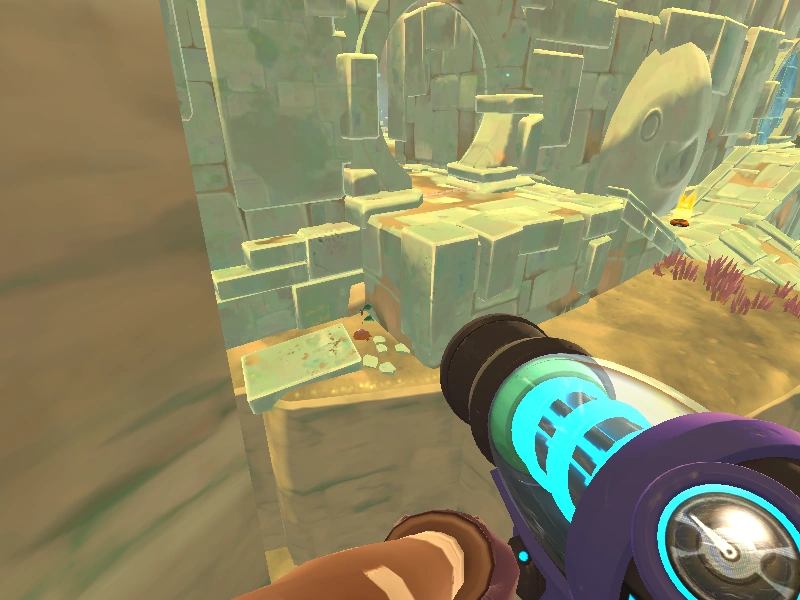
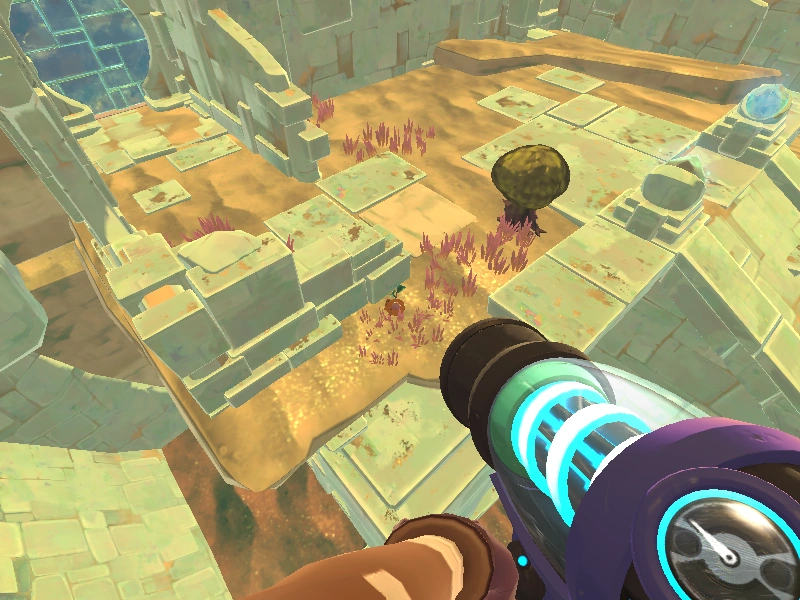
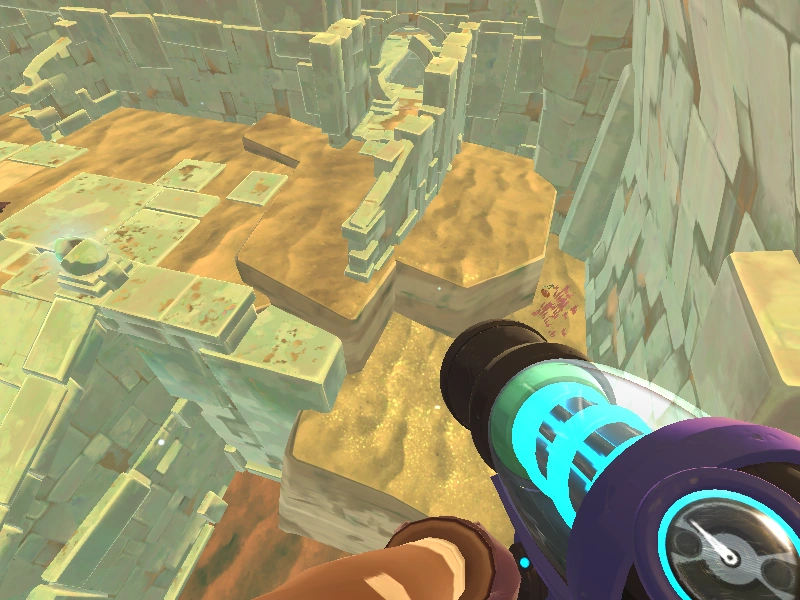
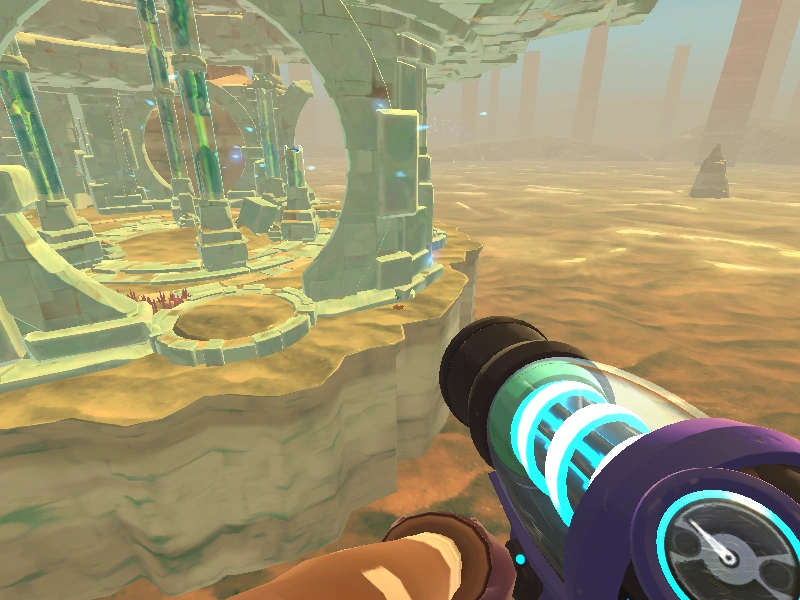
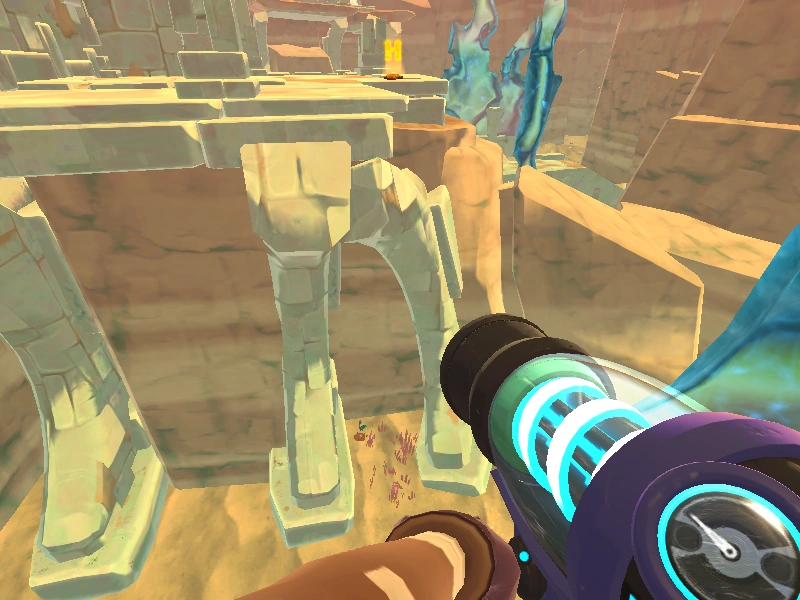
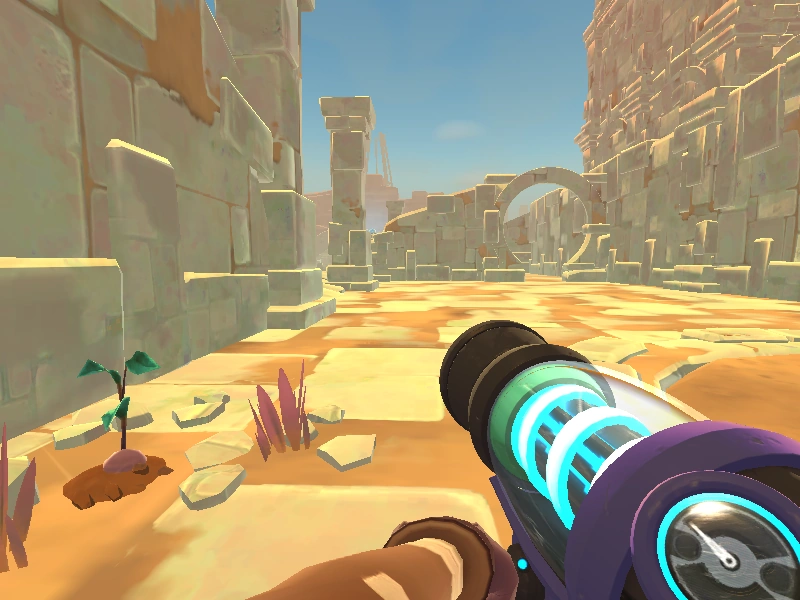
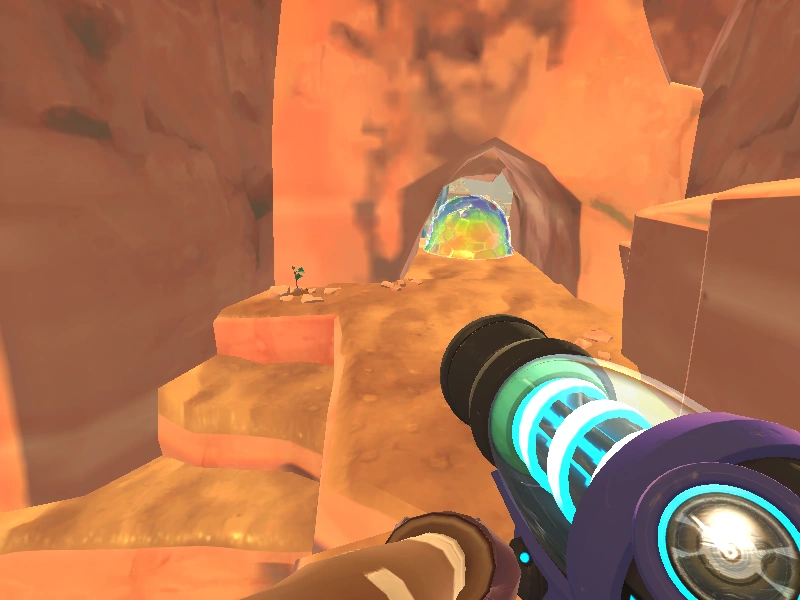
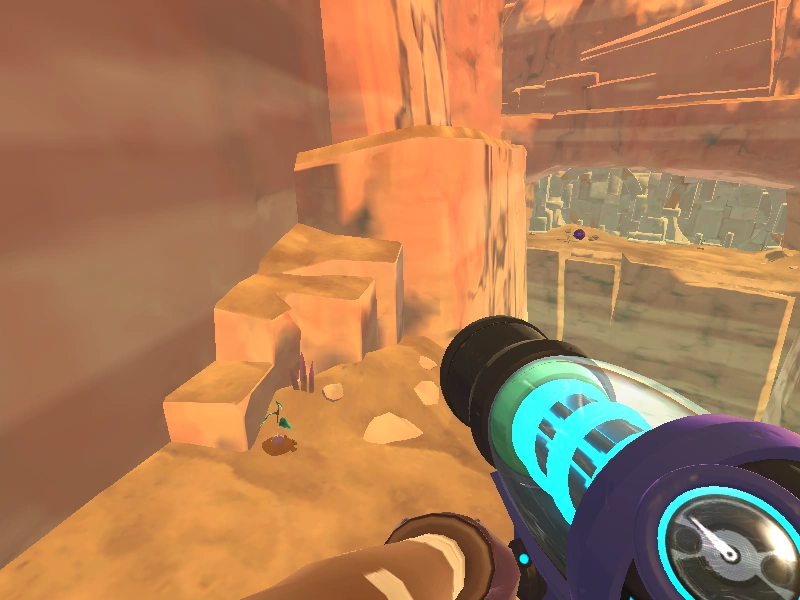
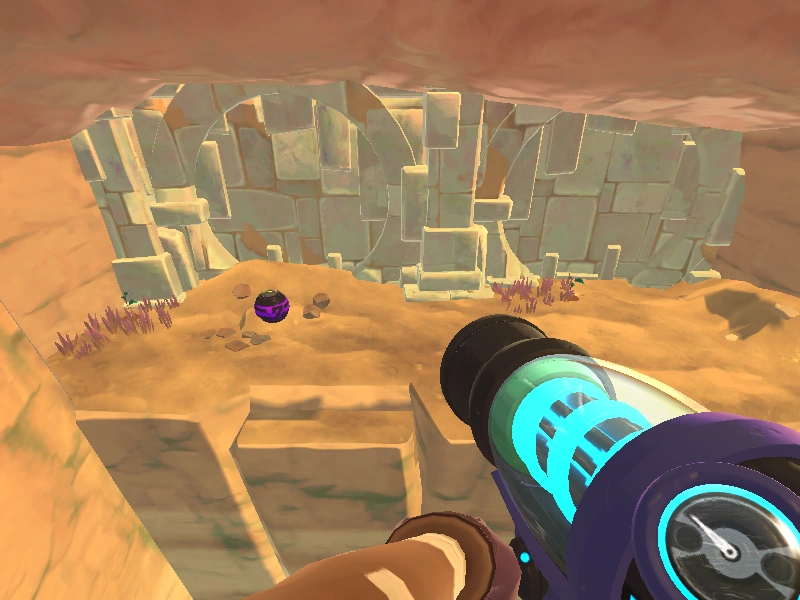
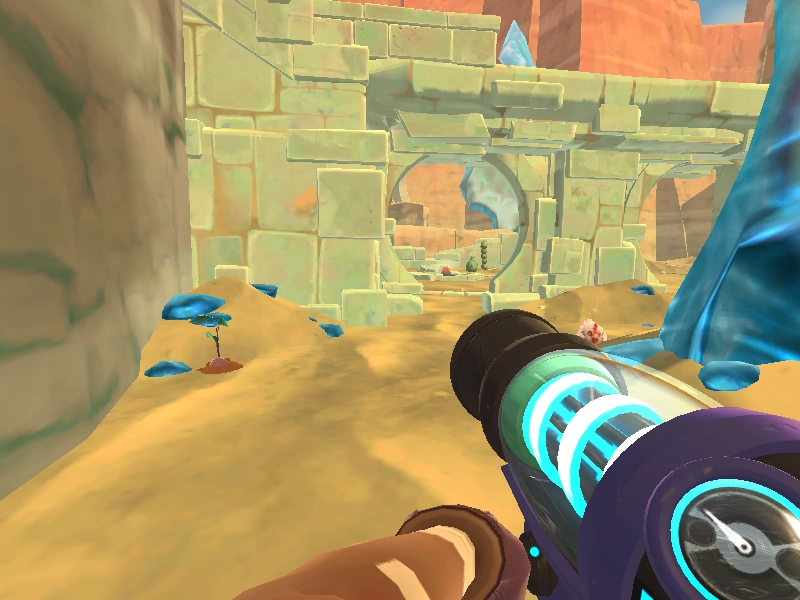
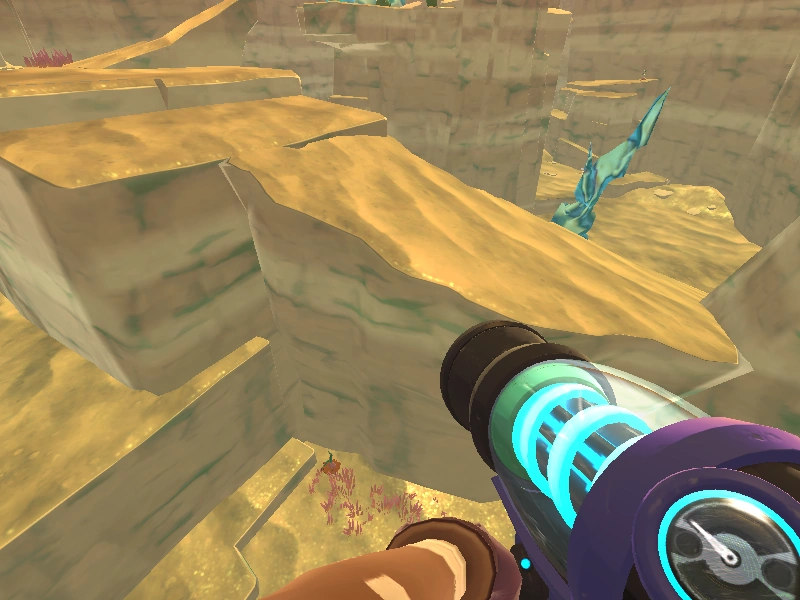
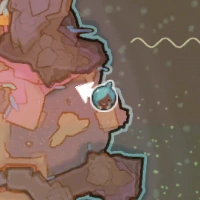
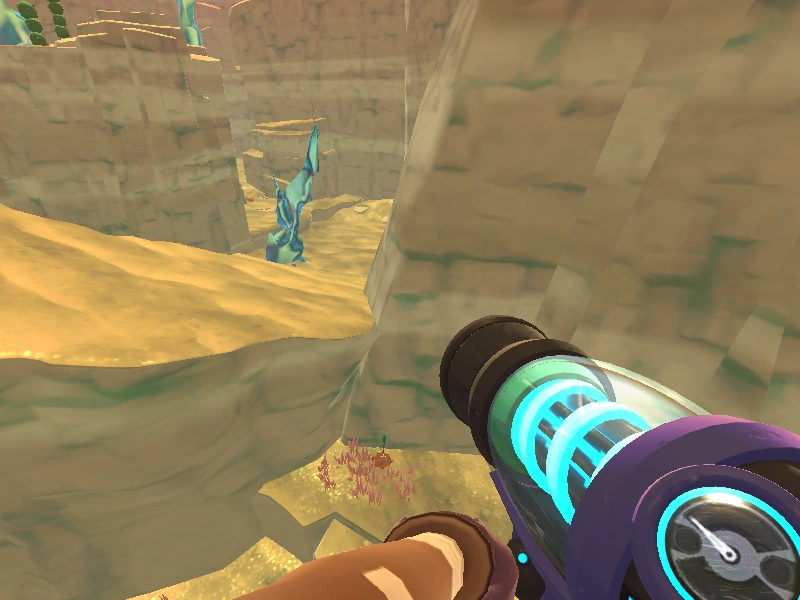
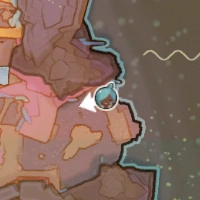
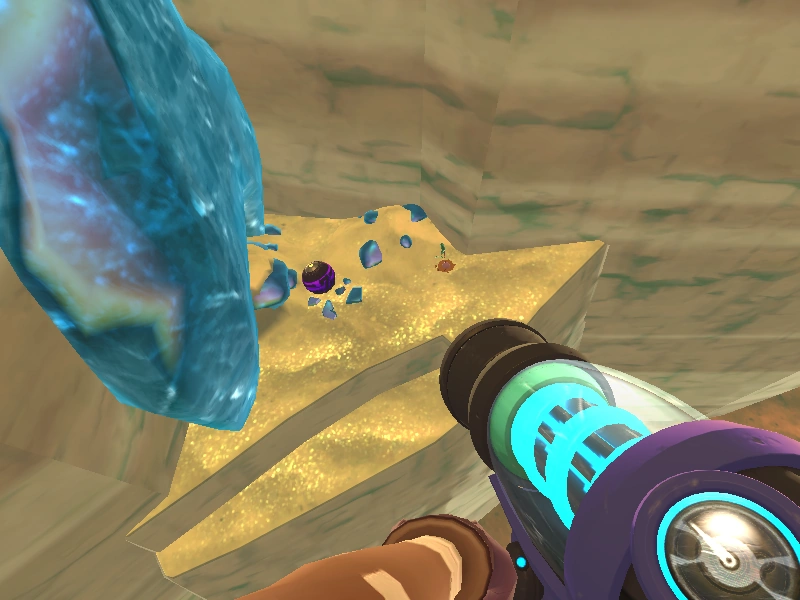
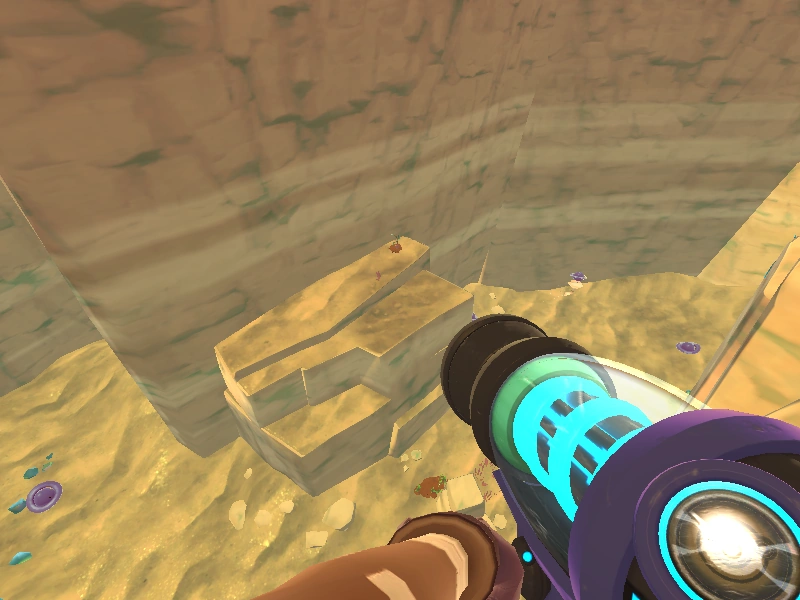
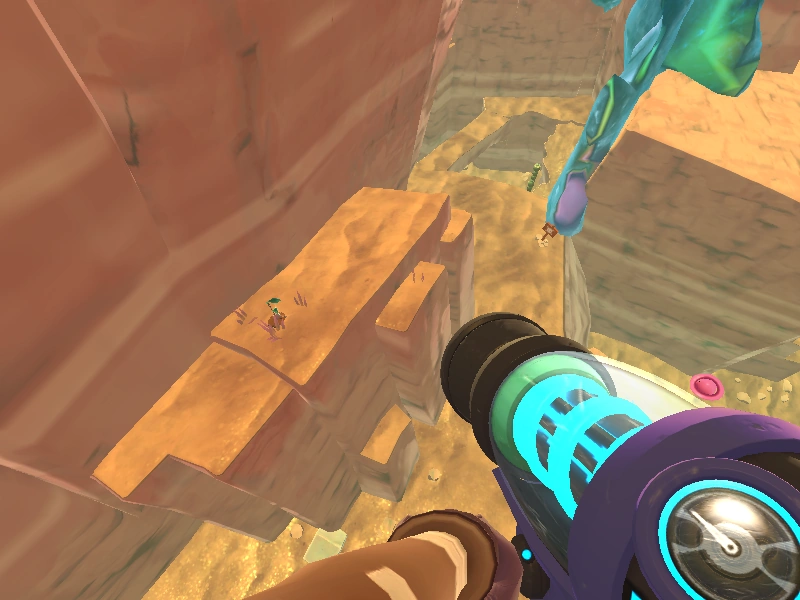
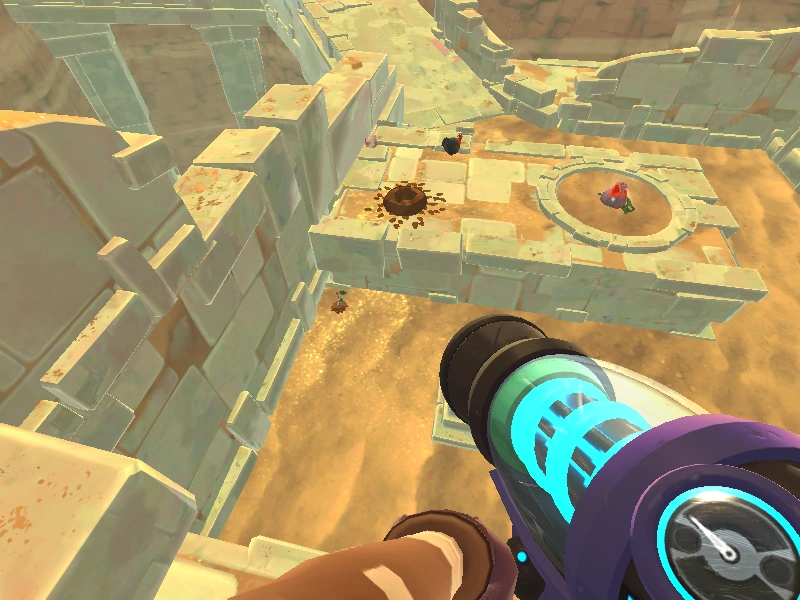
Two Gilded Gingers can spawn in any of the 74 possible locations on a given day.
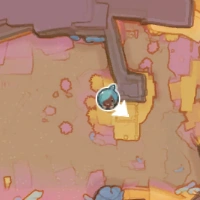
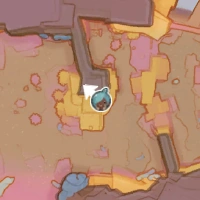
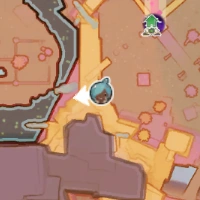
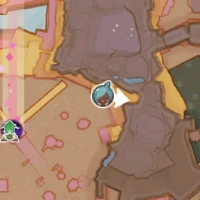
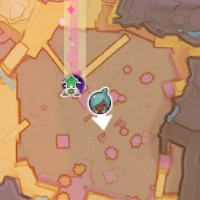
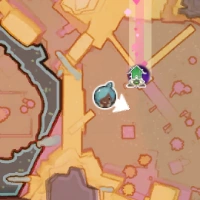
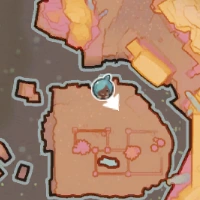
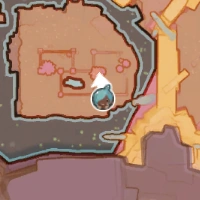
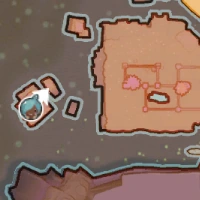
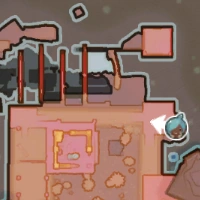
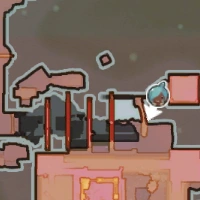
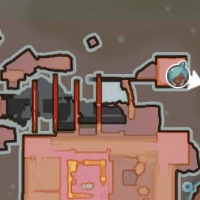
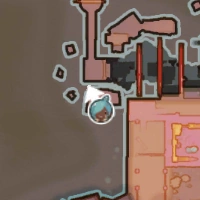
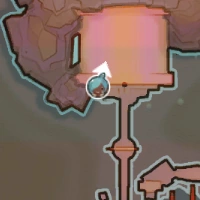
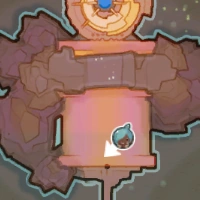
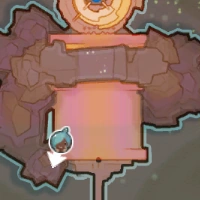
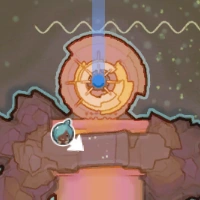
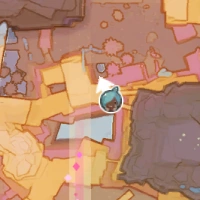
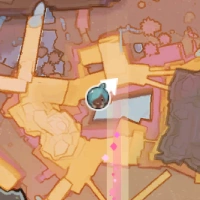
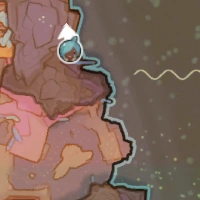
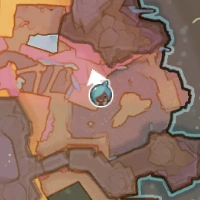
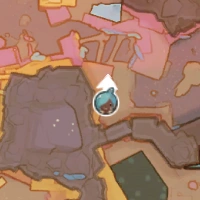
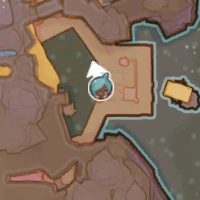
Since the in-game map is very simplistic prior to being unlocked using Map Data Nodes and this page uses fully-unlocked maps to pinpoint locations, it is recommended to activate the Desert's Map node first before proceeding.
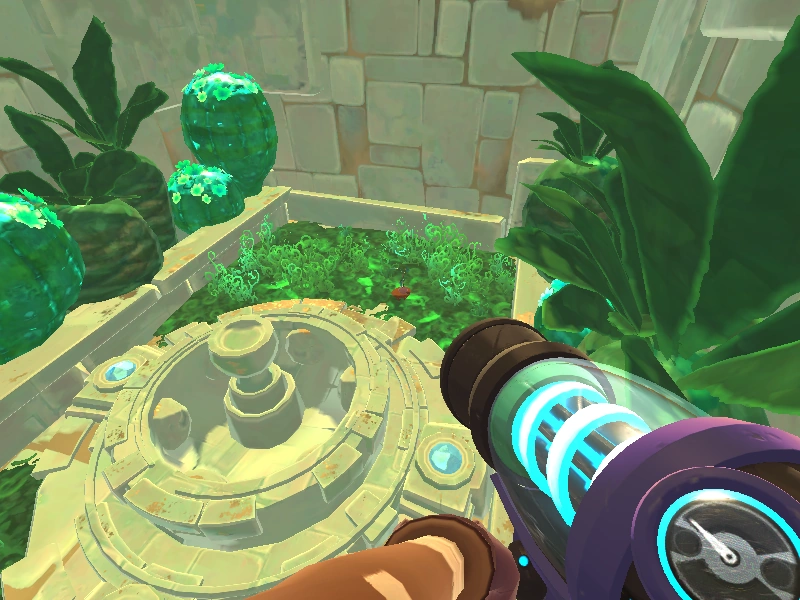
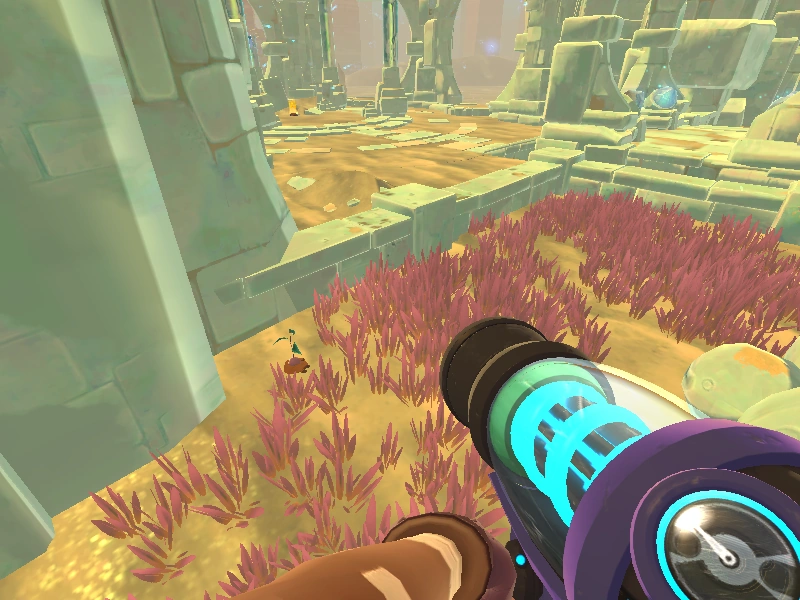
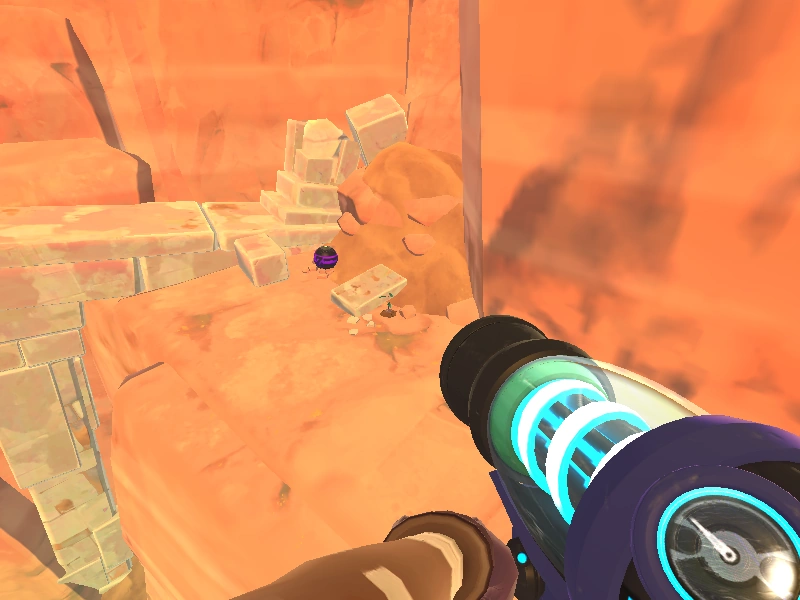
Some images may have multiple Gilded Gingers to showcase that a single location has multiple spawn points.
Map
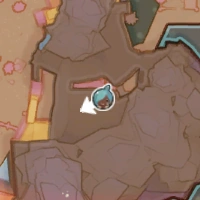
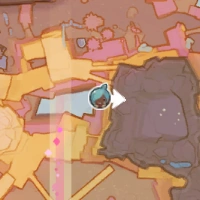
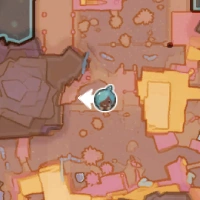
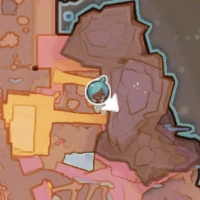
Glass Desert entrance
|
| |
|
| |
|
| |
|
| |

|
| |

|
| |
|
| |
|
| |
|
| |
|
| |
|
| |
|
| |

|
| |
|
| |
|
| |

|
| |
|
| |
|

| |
|
| |
|
| |
|
|
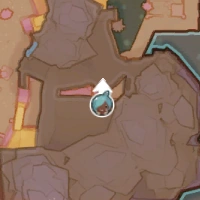
Tangle Gordo Tower Courtyard
|
| |
|
| |
|
| |
|
| |
|
| |
|
| |
|
| |
|
|
Miscellaneous
|
|
West Slime Gate
|
| |
|
| |
|
| |
|

| |
and #38 |
|
|
|
| |
|
| |
|
| |
|

|
Northern Glass Desert
|
| |
|
| |
|
| |
|
| |
|
| |
|
| |
|
| |
|
| |
|
| |
|
| |
|
| |
|
| |
|
| |
|
|
Behind the Mosaic Gordo
|
| |
|
| |
|
| |
|

|
East Slime Gate

|
| |
|
| |
|
| |
|
| |
|
| |
|
| |
|
| |
|
| |
|
| |
|
| |
|
|
| Map | World Map • Map Data Nodes |
|---|---|
| Upgrades | Ash Trough |
| Collectables | Gilded Ginger (Locations) • The Ranch Treasure Pods |